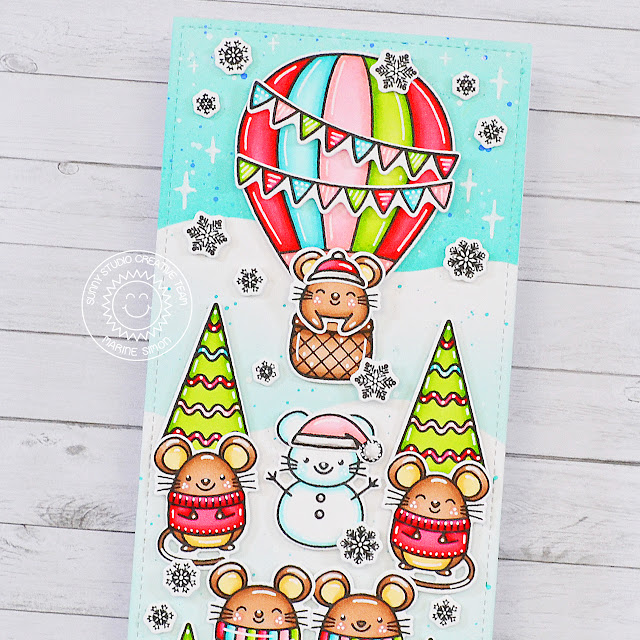
Sunny Studio - Merry Christmouse

jeudi 30 novembre 2023

Lawn Fawn - Christmas Before 'n Afters with The Grinch

mardi 28 novembre 2023

Hi there,

I'm so happy to be back on Lawn Fawn YouTube Channel & Blog with this new Magic Picture Changer card, and today story features Mr and Mrs Grinch, they are gathered around the Christmas tree, and Mr Grinch decides to prank Mrs Grinch and switches off and on and off and on the lights in the tree :D


The process video is linked down below, so feel welcome to check it out to get all the details, and as always, the supplies I used to create this fun card are listed down below.


VIDEO


LAWN FAWN SUPPLIES

Stamp sets
- Yeti or not
- Christmas before 'n afters
- A creature was stirring
- Baaah humbug
- Christmas dreams
- Beachy Christmas
- Wood you be mine
- Riley's ABCs

Die sets
- Magic picture changer die set
- Large stitched square stackables die set
- Outside in stitched square stackables die set

Cardstock & pattern papers
- Cilantro cardstock
- Chili pepper cardstock
- Let it shine 6x6 paper pack

Misc
- Jet black ink
- Clear embossing ink
- White embossing powder
- Post-it notes


OTHER SUPPLIES
- Spectrum Noir Illustrator markers
- Graph'it brush markers
- Ohuhu markers
- Oxide inks: salvaged patina, peacock feathers, antique linen, vintage photo
- Sakura white gel pen
- Copic opaque white ink
- 80lb Neenah solar white cardstock (images)
- Strathmore bristol smooth cardstock (background)

Sunny Studio - Merry Mocha - Black Friday Gift w/ Purchase

jeudi 23 novembre 2023

Hello there,

Happy Thanksgiving! I'm super happy to be back on Sunny Studio's blog with this set of see-through shaker tags showcasing the adorable Merry Mocha mini stamp set. I love making tags throughout the year, but especially during the holiday season, and I thought this cup of mocha was the perfect size for tags. And what's better than gingerbread cookies to go with this delicious hot beverage?

*****

But first let's check out the details about Sunny Studio Black Friday offer:

The Merry Mocha Stamps used today are not available for purchase this holiday season but rather will be automatically included with all retail orders of $45 or more from Sunny Studio through November 27th at Midnight PDT. Here are all the details:

Receive free shipping on U.S. orders of $40+

+ Receive the exclusive mini "Merry Mocha" stamp set with a $45+ purchase

+ Receive the coordinating "Merry Mocha" dies with a $75+ purchase

+ 10% of retail sales will be donated to the Maui Strong Fund with the Hawaii Community Foundation

*Please note: No discount codes are needed. All offers will be applied automatically and cannot be combined with additional discounts at checkout. Purchases are based on order subtotal, prior to shipping & tax.

*****

To give my tags some kind of a vintage look, I stamped my images on a light kraft cardstock using an alcohol marker friendly black ink. As always I used the coordinating dies to cut them all, and colored everything using my alcohol markers, except for the white sections that I colored using a white colored pencil. So, along with the Merry Mocha cups, I stamped the gingerbread couple from Christmas Cookies, as well as the one from Baking Spirits Bright and the candy canes from that same set.


Next I worked on the tags. I started off by cutting six tag shapes out of a dark kraft cardstock using a die from Mini Mat & Tag 3, cut an opening inside each tag panel using another die from the same set, and then attached a piece of acetate at the back of each tag. I set three of those tags aside, and at the back of the three other tags, I attached foam strips all along the opening to create room for my shaker material. I added polymer clay candy cane slices inside that space, as well as clear glitter, and used the three tags I had put aside to close the three others.


I attached a cup of Merry Mocha, candy canes and a gingerbread cookie on each tag using 1mm foam squares, I also created three identical greetings using the "Eat Drink and Be Merry" sentiment from Merry Mocha. I white heat embossed three greetings on brown cardstock, and used the matching die to cut them. Next I cut three small tags out of the same light kraft cardstock as the images using a die from Wrap Around Box, and I stuck a greeting on each small tag using 1mm foam squares again. To finish my tags, I tied each small tag to a bigger one using white thread, and I created three red bows that I stuck at the top of each tag using 3mm glue dots.


SUNNY STUDIO SUPPLIES
- Merry mocha mini stamp set
- Christmas cookies stamp set
- Baking spirits bright stamp set
- Mini mat & tag 3 die set
- Wrap around box die set


OTHER SUPPLIES
- Graph'it brush markers
- Ohuhu markers
- White colored pencil
- Clear embossing ink by Lawn Fawn
- Fine white embossing powder by Hero Arts
- Jet black ink by Lawn Fawn
- Candy cane lane confetti by Prima Marketing
- Glitter by Studio Katia
- White thread from my stash
- Red ribbon by Flying Tiger
- Cardstocks by Lawn Fawn

Pretty Pink Posh - Christmas Cupcakes Duo

lundi 20 novembre 2023

Hi there,

I'm thrilled to be back with this duo of holiday cards showcasing the ever so cute Christmas Cupcakes by Pretty Pink Posh, and the beautiful Layered Candy Canes stencils. I started off by cutting two Eyelet Rectangles out of Strathmore bristol smooth cardstock, and I colored them using oxide inks: salvaged patina for a light blue, and spun sugar for a light pink.


Next I used the Layered Candy Canes stencils on both panels using white pigment ink first, and then festive berries oxide ink. And as for texture, I mixed some copic opaque white ink with water and used a small brush to add splatters to both panels, nothing more.


Next I stamped the six cupcakes from Christmas Cupcakes on 80lb Neenah solar white cardstock using an alcohol marker friendly black ink, cut them all using the coordinating dies, and colored everything using my alcohol markers.


I cut two smaller Eyelet Rectangles out of vellum and attached three cupcakes on each panel using 1mm foam squares. I also cut two Merry Christmas shadow greetings out of gold mirror cardstock, attached them on my panels, and then I stuck each vellum panel on a Layered Candy Canes panel using liquid glue behind the cupcakes. I attached my panels on white card bases, and finished them by adding highlights and details on the images using a white gel pen, as well as Metallic Gold pearls on each corner.


PRETTY PINK POSH SUPPLIES
- Christmas cupcakes stamp set
- Eyelet rectangles die set
- Merry Christmas shadow die
- Layered candy canes stencils


OTHER SUPPLIES
- Spectrum Noir Illustrator markers
- Graph'it brush markers
- Ohuhu markers
- Oxide inks: salvaged patina, spun sugar, festive berries
- White pigment ink by Lawn Fawn

Pretty Pink Posh - Penguin Pals & Holiday Trees

samedi 18 novembre 2023

Hello there,

I'm so very happy to be back on the blog with this adorable holiday card featuring the amazing Holiday Trees layering stamp set by Pretty Pink Posh that you can use to build the most gorgeous trees. I really had a blast making all those trees!


And speaking of which, I started off by creating a bunch of trees. I first stamped the outline of each tree on 80lb Neenah solar white cardstock using an alcohol marker friendly black ink, and next I used Lawn Fawn premium dye inks to fill with colors each tree shape:

 for the light pink trees, I used ballet slippers as the base color and bubblegum for the details, and for the dark pink trees, I used bubblegum as the base color and plastic flamingo for the details

 for the light aqua trees, I used kiddie pool as the base color and mermaid for the details, and for the dark aqua trees, I used mermaid as the base color and peacock for the details

 for the light purple trees, I used fresh lavender as the base color and grape jelly for the details, and for the dark purple trees, I used grape jelly as the base color and sugarplum for the details

 for each of the trees, I used crunchy leaf to stamp the trunks


I cut all the trees using the matching dies, and moved on to the penguins from Penguin Pals. I stamped them along with two beanies on 80lb Neenah solar white cardstock, cut the images using the coordinating dies, and then colored them using my alcohol markers in colors that matches the Holiday Trees.

Next I created a pretty simple wintery landscape on a 5,5 x 4,25 inches Strathmore bristol smooth panel. On three quarters of the panels, I did snow hills using a hill stencil from my stash along with salvaged patina oxide ink, and I added texture using a mix of peacock feathers oxide ink and water. At the very top I did a night sky using peacock feathers and wilted violet oxide inks. I splattered water droplets on that section that I dried using a paper towel. And then I mixed some copic opaque white ink with water, and used my small brush to make splatters all over my panel.

Once my panel was dry, I silver heat embossed my "Merry wishes" greeting from Penguin Pals at the bottom of my panel, attached my trees and penguins using 1mm foam squares, and finally added highlights and details to the images using a white gel pen.


PRETTY PINK POSH SUPPLIES
- Holiday trees stamp set
- Penguin pals stamp set


OTHER SUPPLIES
- Spectrum Noir Illustrator markers
- Graph'it brush markers
- Ohuhu markers
- Oxide inks: salvaged patina, peacock feathers, wilted violet
- Premium dye inks by Lawn Fawn: ballet slippers, bubblegum, plastic flamingo, kiddie pool, mermaid, peacock, fresh lavender, grape jelly, sugarplum
- Sakura white gel pen
- Copic opaque white ink
- Jet black ink by Lawn Fawn
- Clear embossing ink by Lawn Fawn
- Silver embossing powder by Lawn Fawn
- Hillside stencil by Lawn Fawn
- Strathmore bristol smooth cardstock (background)
- 80lb Neenah solar white cardstock (images)

Sunny Studio - Feliz Navidad Mini Cards

jeudi 16 novembre 2023

Hello there,

I'm thrilled to be back on Sunny Studio's blog with this new trio of mini holiday cards showcasing a mix and match of images from different sets (listed down below), as well as the Feliz Navidad stamp set.


As you can see I went for a non-traditional color palette, and was actually inspired by Critter Country pattern papers to build and color my three Christmas cards. And speaking of which, I started off by cutting all my papers:
- three stripe panels using the second rectangle die from Stitched Rectangles
- three polka dot panels using a die from Mini Mat & Tag 4
- three gingham green panels using the same die from Mini Mat & Tag 4 again, and from each of those panels, I cut three wavy borders using a die from my stash
- three vellum panels using the smallest rectangle die from Stitched Rectangles

I white heat embossed a greeting on each gingham green wavy border: the words "Hoping your... is" and "on point" from Looking Sharp, and the word "holiday" from Santa Claus Lane, in order to read "Hoping your holiday is on point".


I followed the same order to layer my panels and used liquid glue to attach them on top of each other: a stripe panel on a card base, next a polka dot panel on top, then a vellum panel (I put the glue only at the bottom of it), and finally a gingham green wavy border. I set my card bases aside, and moved on to the stamping.


I stamped all my images on 80lb Neenah solar white cardstock using an alcohol marker friendly black ink, cut them all using the coordinating dies, and colored everything using my Graph'it brush markers and Spectrum Noir Illustrator markers. And as I was saying, I followed the same color palette as the pattern papers to color my images. Here is a detailed list of the sets I used:

Lovable Llama: llamas, presents
Looking Sharp: cactus
Scene Route: lights
North Pole: nice list
Penguin Pals: candy canes
Garden Critters: grass
Merry Mice: scarves


Once everything was colored, I attached the images on my panels: the lights and cactus using liquid glue, and the others using 1mm foam squares. Next I white heat embossed three Feliz Navidad greetings on black cardstock, used the matching die to cut all three, and then attached them on my cards using 1mm foam squares again. And as always I finished my cards by adding highlights and details to the images using a white gel pen.


SUNNY STUDIO SUPPLIES
- Feliz navidad stamp set
- Lovable llama stamp set
- Looking sharp stamp set
- Scenic route stamp set
- Reindeer games stamp set
- North pole stamp set
- Penguin pals stamp set
- Garden critters stamp set
- Merry mice stamp set
- Stitched rectangles die set
- Mini mat & tag 4 die set
- Critter country 6x6 paper pack


OTHER SUPPLIES
- Graph'it brush markers
- Spectrum Noir Illustrator markers
- Sakura white gel pen
- Jet black ink by Lawn Fawn
- Clear embossing ink by Lawn Fawn
- Fine white embossing powder by Hero Arts
- Black licorice cardstock by Lawn Fawn
- Vellum from my stash
- 80lb Neenah solar white cardstock (images)

Lawn Fawn - Fawnie Holiday Week - Christmas Shaker Tags/Ornaments

mardi 14 novembre 2023

Hello there,

I'm thrilled to be back on Lawn Fawn YouTube Channel & Blog with this trio of Christmas shaker tags or Christmas shaker ornaments, featuring one of my favorite holiday stamp set, Making frosty friends, an oldie but definitely a goodie, as well as a mix and match of supplies.


As always all the supplies I used are listed down below, as well as the process video, so feel welcome to check it out to watch the entire process and for more information.


VIDEO


LAWN FAWN SUPPLIES

Stamp sets
- Making frosty friends
- Happy wedding
- Say what Christmas critters

Die sets
- Stitched scalloped rectangle frames
- Outside in stitched rectangle stackables
- Double slider surprise die set

Cardstock & pattern papers
- White cardstock
- Ballet slippers cardstock
- Cilantro cardstock
- Mermaid cardstock
- Knit picky pattern papers
- Spiffy Speckles pattern papers

Misc
- Winter big scripty words hot foil plates
- Snowflake background hot foil plate
- Jet black ink
- Crunchy leaf ink
- Gold sparkle twine
- Acetate


OTHER SUPPLIES
- Spectrum Noir Illustrator markers
- Ohuhu markers
- Graph'it brush markers
- Sakura white gel pen
- Gold foil by Spellbinders
- Speckled prism foil by Spellbinders
- Red ribbon from my stash
- Snowflake polymer clay confetti by Sunny Studio
- Iridescent confetti by Studio Katia
- 80lb Neenah solar white cardstock (images)

Sunny Studio - Truckloads Of Love - Christmas Version

jeudi 9 novembre 2023

Hey there,

I'm back on Sunny Studio's blog with the mice family, and this time they're busy delivering presents and building a snow mouse. If you haven't seen their apple picking adventures yet, you can check it out right here. And among many stamp sets (listed down below) my card also features Truckloads Of Love which I've already used here and here.


I started off by creating a simple background on an A2 sized card base. For the sky I used a multicolor polka dot paper from the All Is bright 6x6 paper pack, and for the snowy part I used a subtle gingham grey paper from the Joyful Holiday 6x6 paper pack.

As very often, I went through my entire stamp collection to pick a bunch of stamps, stamped all the images on 80lb Neenah solar white cardstock using an alcohol marker friendly black ink, cut them all using the coordinating dies, and then colored everything using my Graph'it brush markers + Spectrum Noir Illustrator markers. Here is a detailed list of the stamps I picked to build my little scene:

 Truckloads Of Love: truck, group of presents
 Harvest Mice: mice, sweaters
 Holiday Express: trees
 Scenic Route: village
 Christmas Critters: mouse (in the truck)
 Merry Mice: mice, scarves, hat
 Penguin Pals: candy canes
 North Pole: nice list, present
 Santa Claus Lane: presents, sack


I white heat embossed my "Driving by to wish you a merry Christmas" greeting from Truckloads Of Love on a pink banner, attached everything on my panel using 1mm foam squares and liquid glue, and finished my card with highlights and details on the images using a white gel pen. And that's it, we have a super cute and fun little scene that will definitely make someone smile. Thank you so much for stopping by, and see you next time.


SUNNY STUDIO SUPPLIES
- Truckloads of love stamp set
- Harvest mice stamp set
- Holiday express stamp set
- Scenic route stamp set
- Christmas critters stamp set
- Merry mice stamp set
- Penguin pals stamp set
- North pole stamp set
- Santa Claus lane stamp set


OTHER SUPPLIES
- Spectrum Noir Illustrator markers
- Graph'it brush markers
- Sakura white gel pen
- Clear embossing ink by Lawn Fawn
- Fine white embossing powder by Hero Arts
- Pink cardstock by The Stamp Market
- 80lb Neenah solar white cardstock (images)

Pretty Pink Posh - Christmas Dinosaurs Slimline Card

mardi 7 novembre 2023

Hello there,

I'm so happy to be back with this adorable tropical holiday card showcasing Christmas Dinosaurs by Pretty Pink Posh. I wanted to feature all the dinos on my project so I went for a slimline design, and started off by cutting a Slimline Peekaboo Windows panel out of Strathmore bristol smooth cardstock.


I covered the entire panel with salvaged patina oxide ink, and used one of the Layered Leaves & Flowers stencils along with peacock feathers oxide ink to create my tropical background. I also added a little bit of that ink along the four edges, and added texture to make my panel more interesting: I mixed some chipped sapphire oxide ink with water and used a small brush to make splatters on the paper, and I did the same with copic opaque white ink.


Next I stamped my images on 80lb Neenah solar white cardstock using an alcohol marker friendly black ink, cut them all using the matching dies, and colored everything using my alcohol markers: the dinosaurs, palm trees and fern leaves from Christmas Dinosaurs, and the flowers, leaves and ivy from Jungle Friends. I kept the dinos pretty neutrals with browns and greys, and used my favorite color combo when I make tropical cards: aqua, blue, green and yellow.


Next I white heat embossed my "Merry Rex-mas" greeting from Christmas Dinosaurs in the middle of my tropical slimline panel, attached all the images using 1mm foam squares, stuck my panel on a bigger Slimline Peekaboo Windows stripy green panel using double sided tape, and finished my card by adding highlights and details to the images using a white gel pen.


PRETTY PINK POSH SUPPLIES
- Christmas dinosaurs stamp set
- Jungle friends stamp set
- Slimline peekaboo windows die set
- Layered leaves & flowers stencils


OTHER SUPPLIES
- Spectrum Noir Illustrator markers
- Graph'it brush markers
- Ohuhu markers
- Oxide inks: salvaged patina, peacock feathers, chipped sapphire
- Sakura white gel pen
- Copic opaque white ink
- Jet black ink by Lawn Fawn
- Clear embossing ink by Lawn Fawn
- Fine white embossing powder by Hero Arts
- Stripy green pattern paper by Lawn Fawn
- Strathmore bristol smooth cardstock (background)
- 80lb Neenah solar white cardstock (images)

Sunny Studio - Happy Hanukkah Shaker Card

samedi 4 novembre 2023

Hello there,

I'm very happy to be back on Sunny Studio's blog with this bright Hanukkah card showcasing the beautiful Love & Light stamp set which includes the perfect images to make your own Hanukkah card or tags.


I decided to go for a shaker card, and started off by cutting three different elements to build it:
 an A2 sized Dotted Diamond Landscape blue panel
 an A2 sized Spring Sunburst blue panel
 an A2 sized acetate panel
 a gold glitter frame using the Stitched Oval 2 + Scalloped Oval Mat 1 largest dies

I added a little bit of prize ribbon + black soot distress inks on the edges of my Dotted Diamond panel, and used the largest Stitched Oval 2 die to cut an opening right in the middle of it. I attached the acetate panel at the back using double sided tape, and added foam strips all along the four edges of my panel, as well as around the oval opening. I poured a bunch of golden sequins inside the window, and then stuck my Spring Sunburst panel on the foam to totally close the shaker. And to decorate the oval window nicely, I attached my gold glitter frame using liquid glue.


Next I stamped all my images on 80lb Neenah solar white cardstock using an alcohol marker friendly black ink, cut them all using the matching dies, and colored everything using my Spectrum Noir Illustrator markers + Graph'it brush markers. I also white heat embossed my "Happy Hanukkah" greeting from Love & Light on black cardstock and cut it using the coordinating die.


I attached everything on my shaker panel using 1mm foam squares and liquid glue, and finally added highlights and details using a white gel pen. And here's another idea, as I'm writing this, you could create a wreath with the olive branches and put either the dove in the center, or the candelabrum, or even just the greeting, any of these would look amazing!


SUNNY STUDIO SUPPLIES
- Love & light stamp set
- Dotted diamond landscape backdrop die
- Stitched oval 2 die set
- Scalloped oval mat 1 die set
- Spring sunburst 6x6 paper pack


OTHER SUPPLIES
- Spectrum Noir Illustrator markers
- Graph'it brush markers
- Distress inks: prize ribbon, black soot
- Clear embossing ink by Lawn Fawn
- Fine white embossing powder by Hero Arts
- Black licorice cardstock by Lawn Fawn
- Cobalt cardstock by The Stamp Market
- Gold glitter cardstock by Concord & 9th
- Sakura white gel pen
- 80lb Neenah solar white cardstock (images)
- Golden sequins by Spellbinders