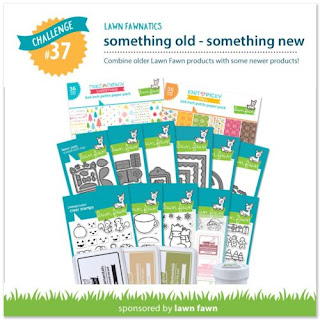
Lawn Fawnatics Challenge #37 || Something old, something new || Gingerbread House || Holiday Pop-Up Card

samedi 29 septembre 2018


Hey there,

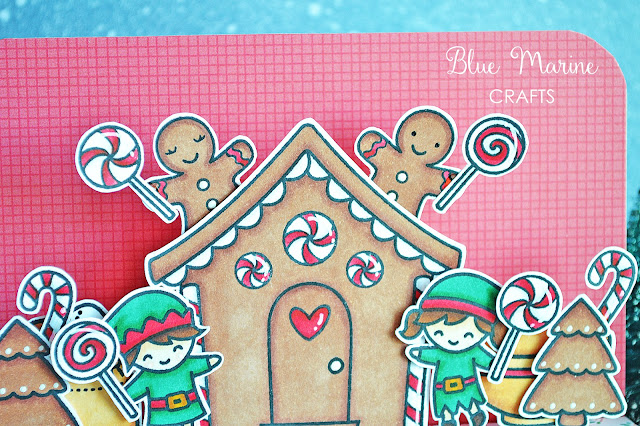
Here is the second card I made for the Lawn Fawnatics "Something old, something new" challenge. It was so much fun combining these stamp sets, I think they go together very well.


I first started by cutting all the needed papers to build the pop-up base: two large rectangles for the wall and the floor, one piece for the counter/table and one last element for the tablecloth. Everything was cut and scored according to measurements (shown in the video ^^) Next I assembled everything.


I stamped all my images on Neenah solar white cardstock, colored them using alcohol markers and then fussy cut them. I used a white gel pen to add some highlights here and there.


I made three small pop-up mechanism to attached the gingerbread house, the bowl and the bag of flour both on the wall and the counter/table. Next I attached all the other elements using foam square adhesives.


For my sentiment, I first stamped a frame on white cardstock using red ink. Next I stamped two small snowflakes on each side using the same red ink, added my sentiment right in the middle of it using black and cut the element using the coordinating die.


At the back of the pop-up scene, I stamped a bunch of images using a light brown ink, and to keep the pop-up card closed so it can be mailed, I stamped a small circle frame on white cardstock using the same red ink as before, attached the last image I had left in the middle of it, cut two large strips that I joined together using the element previously made, then wrapped it around the folded card and closed the strip using double sided tape.

VIDEO
Below or here

LAWN FAWN SUPPLIES
- Holiday helpers stamp set
- Sweet Christmas stamp set
- Baked with love stamp set
- Just for you stamp set
- Just for you labels stamp set + coordinating die
- Stitched scalloped border die
- Really rainbow Christmas "Rudolph Red" paper
- Let's bokeh in the snow "Snowflake Twist" paper
- Perfectly plaid "Cinnamon Spice" paper
- Snow day paper pack

OTHER SUPPLIES
- Spectrum Noir markers
- Neenah solar white cardstock (for the images)
- Neenah desert storm cardstock (for the card base)
- White gel pen by UniBall

Lawn Fawnatics Challenge #37 - Something old, something new - Holiday + Diorama Card Series

samedi 22 septembre 2018


Hello there,

Unless you're new on my blog, I'm sure you know that I love to build diorama scenes using all kinds of stamp sets. So for this challenge, I thought it would be nice to use several border dies to create a pretty winter landscape, and two cute images from the new Winter Skies stamp set.


I first started by cutting all the paper elements: the diorama base + insert pieces, a mountain border, a tree border, a house border and three cloud borders to use as snow borders. To add some cuteness and give the illusion of snow, I applied clear glitter drops on the edges of the borders.


I attached the insert pieces on the inside right and left, and then attached each border on an insert piece.


I stamped my images on Neenah solar white cardstock, colored them using my spectrum noir markers and cut them using the coordinating dies. I attached the bears on the second snow border using glue dots, and finally I attached Santa in the sky using a thin strip of acetate that I glued the same way as the insert pieces.

VIDEO
Below or here

LAWN FAWN SUPPLIES
- Winter skies stamp set + coordinating dies
- Stitched mountain border die
- Forest border die
- Little town border die
- Puffy cloud border die

OTHER SUPPLIES
- Spectrum Noir alcohol markers
- Pattern paper from my stash
- White cardstock by HobbyCraft
- White blizzard nuvo drops

Holiday Card Series 2018 - Christmas Picture Book

mercredi 19 septembre 2018

Hello there,

I've been wanting some Picture Book wafer dies by Simon Says Stamp for a very long time, so when I got those ones, I was very happy, and decided to make several cards with them using the same design but different color combos.


I first started by applying distress inks on Strathmore bristol smooth cardstock; I used two shades per card. And next, I applied white ink on each distress ink background using a snow stencil and a finger dauber. I let the ink dry over night.


Next I die cut and assembled my four characters: a snowman, a moose, a deer and Santa, using several cardstocks from my stash. I used liquid glue to attached everything.


I also die cut four scalloped borders, four "Fa la la" in four different glitter cardstocks, and four outlines in vellum. I attached one glitter piece on one vellum piece to form the first part of the sentiment. For the second part, I simply white heat embossed the words "Merry Christmas" on black cardstock.


Next I attached everything on the distress ink panels using foam adhesive squares and liquid glue. I also added white highlights on each character, and clear drops on some of the snowflakes in the background. And finally I attached each panel on a white card base.


VIDEO
Below or here

SUPPLIES
- Picture Book Deer wafer die by SSS
- Picture Book Snowman wafer die by SSS
- Picture Book Santa wafer die by SSS
- Picture Book Moose wafer die by SSS
- Fa la la wafer die by SSS
- Falling snow stencil by SSS
- Distress inks: tumbled glass, peacock feathers, shaded lilac, blueprint sketch, cracked pistachio, lucky clover, victorian velvet, seedless preserve
- Cardstocks and pattern papers from my stash
- Versamark ink
- White embossing powder by Aladine
- White gel pen from UniBall

Holiday Card Series 2018 - Winter Village

vendredi 14 septembre 2018

Hey there,

Today I'm back to share a new holiday card featuring a stamp set I didn't get the chance to use last year, so I was very happy to work with it for the first time.


I first started by stamping all my images on Neenah solar white cardstock using alcohol marker friendly black ink, next I colored them using my Spectrum Noir markers and then I cut everything using the coordinating dies.

I cut a large rectangle from light blue bokeh paper and attached it to a white card base using double sided tape.


I die cut peekaboo frame, and used the little left over squares and rectangles to die cut cloud borders to use as snow grounds. Next I glued those little snow borders in place using the frame as a guide. And then I attached the frame using small adhesive squares.


I attached all my images using adhesive squares and liquid glue, gold heat embossed my sentiment on a banner, attached it in the middle of the panel and applied clear glitter here and there on the houses and tress to finish the card.

VIDEO
Below or here

LAWN FAWN SUPPLIES
- Winter village stamp set + coordinating dies
- Peekaboo backdrop die
- Everyday sentiment banner die
- Let's bokeh in the snow pattern paper

OTHER SUPPLIES
- Spectrum Noir markers
- Neenah solar white cardstock
- White cardstock from HobbyCraft (card base + frame + banner)
- White blizzard Nuvo Drops
- Versamark ink
- Antique gold enbossing powder from Simon Says Stamp

Lawn Fawnatics Challenge #36 - Hello Fall

samedi 8 septembre 2018


Hello there,

I know I've already started my Holiday Card Series but the new Lawn Fawnatics "Moodboard" Challenge allows me to share my first Fall card of the year. I picked a bunch of dies and stamps from Lawn Fawn to create this cute little scene.

Here is the image that inspired me:


I first started by stamping my images on Neenah Solar White cardstock. Just a few, as the whole card is about the autumn colors of the scenery. I colored them using my alcohol markers, and then cut them using the coordinating dies.


Then I die cut all the elements I needed to build the scene: a tree backdrop in dark brown cardstock, leaves in green, yellow and red cardstocks, a large frame in red cardstock, tree borders in dark brown cardstock and their foliage in the same colors as the leaves, a hill border, a grass border and a cloud border (to make bushes) in green cardstock.


My colors of cardstocks were a little bit too flat so I added some distress ink to all the die cut elements to add some depth and interest. The sky was created using orange and yellow distress oxide inks on Strathmore bristol smooth cardstock.

On this sky panel, I attached the cloud border (bushes) and the hill border. I cut the trees from the dark brown tree borders, tucked them the bushes and glued them along with the foliage.


At the bottom of the tree backdrop frame, I attached the grass border, and next on top of it I attached the red rectangle frame. At the back of one of the branches I attached the swing. I gold heat embossed my sentiment on the top right corner of the sky. And I finally attached the tree backdrop panel on top of the sky panel to complete the scenery.

Next I attached the images and the leaves using liquid glue and/or glue dots and/or foam adhesive squares. To finish the card, I simply attached the whole panel to a kraft card base.

VIDEO
Below or here

LAWN FAWN SUPPLIES
- Let's play stamp set + coordinating dies
- Toboggan together stamp set + coordinating dies
- Cheery Christmas stamp set + coordinating dies
- Critters on the farm stamp set + coordinating dies
- Leafy tree background: landscape die set
- Stitched tree border die set
- Grassy border die set
- Simple stitched hillside border die set
- Puffy cloud border die set
- Stitched rectangle frame die set

OTHER SUPPLIES
- Spectrum Noir alcohol markers
-  Distress inks: forest moss, fired brick, rusty hinge, ground espresso
- Colored cardstocks from my stash
- Strathmore bristol smooth cardstock
- Neenah solar white cardstock
- Kraft cardstock from Hero Arts
- White gel pen from UniBall
- Versamark ink
- Antique gold embossing powder from Simon Says Stamp