Lawn Fawn - Four Seasons - Flippin Awesome Card

jeudi 29 août 2019

Hello there,

In today's video I'm going to show you how I created this card using the brand new Flippin Awesome die set and add-ons by Lawn Fawn. This new interactive die is just awesome and so easy to use, and I can't wait to create more cards with it.


So I first started by cutting the main moving piece out of kraft cardstock. The die creates four score lines in the center and two other score lines to create tabs. I simply folded those four lines first using my bone folder. I'm doing it in both directions, it will help the flippin mechanism work smoothly. And next I folded the tabs.


To create my small sceneries, I cut four squares out of kraft cardstock, four squares out of pattern papers from the Spiffy Speckles paper pack, four stitched squares out of the same pattern papers, and four squares out of different cardstocks that I will use for the ground.

First I adhered each stitched square to a kraft square, and next I attached each kraft panel to the coordinating square: yellow with yellow, lilac with lilac, green with green. The blue panel will be totally glued to the moving piece so no need to back it with a blue square like the others.


Before attaching my small panels, I wanted to create a pocket, so I used the diagonal gift card pocket die to cut a nice plaid pocket that will coordinate with the Spiffy Speckles papers. The die creates score lines so i folded them, applied liquid glue on the tabs, and attached the pocket to the main piece.


Next I flipped the main piece over, applied double sided tape on the tabs, making sure to cover them entirely (I like to use a small acrylic block to cut the tape right on the edges of the cardstock), I applied tape on the square part, and also on each strip.

The blue panel will be my last panel in this flippin scene so I'm going to attach it first to this square part. The square part will always show the last panel of your flippin card so if you create something chronological, be sure to put your panels in the right order. Next I removed the back of the tape on each strip and attached the other panels.

To give a nice and colorful background to my flippin element, I used the scalloped rectangle die from the add-on set to cut a beautiful panel out of the same plaid paper as the pocket.
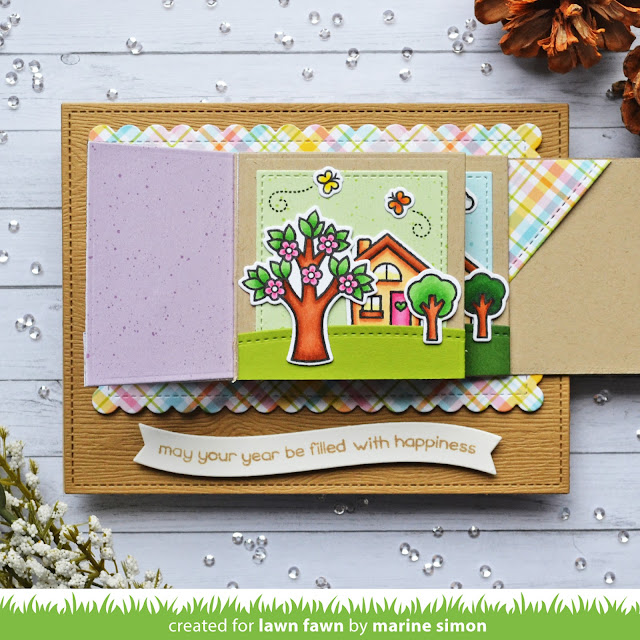


To attach the whole flippin element, you have to fold it to be able to hug the tabs around it. So you remove the back of the tape on the tabs, you hug those tabs around, and you press down to your panel to attach the tabs. Next I stamped my sentiment on a white banner using the brand new Crunchy Leaf ink.

I cut a 5,5 x 4,25" stitched rectangle out of woodgrain cardstock and adhered my flippin panel to it using one layer of foam tape. And the banner was attached using foam squares.


I stamped the four trees from the Tree before 'n after stamp set on white cardstock using jet black ink, as well as some additional images to help me create my little scenes.

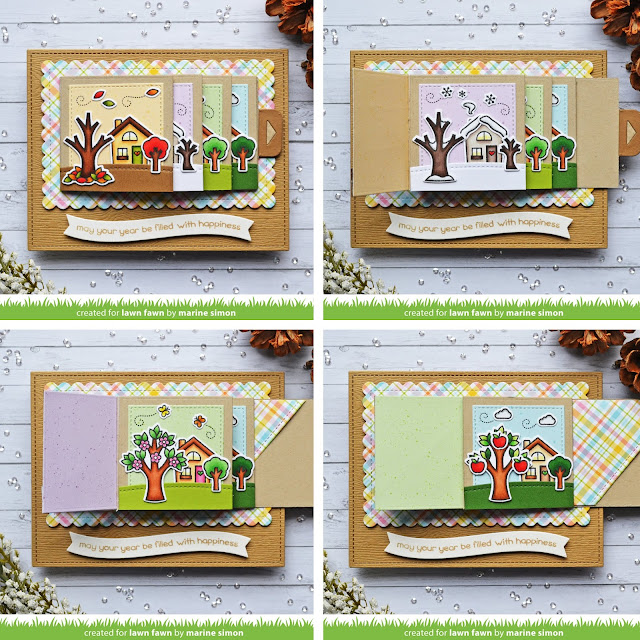
My idea was to create the exact same shot of the same house during the four seasons, like the ones we see in movies sometimes. There is a still frame on screen and only the seasons change to make people understand that time goes by. I've always liked that kind of shots in movies so I tried to recreate that as best possible.

When all the images were colored, I used the coordinating dies to cut them, and I sorted them by seasons. 
But before adhering them, I cut borders out of the squares I cut at the beginning of the video. These borders will help me ground my scenes.


Next I assembled everything, attaching each season on a square panel using 3mm glue dots. I also added cute details on each squares: some leaves in the fall sky, some snowflakes in the winter sky, some butterflies in the spring sky and finally some clouds in the summer sky.

I cut the pull tab arrow out of two different cardstocks, and I kept one arrow and one tab to create the pull tab at the end of my flippin panel. And the very last step was to adhere my panel to a kraft card base.

VIDEO
Below or here

LAWN FAWN SUPPLIES
- Flippin awesome die set
- Flippin awesome add-on die set
- Diagonal gift card pocket die set
- Simple stitched hillside border die set
- Simple wavy banner die set
- Large stitched rectangle die set
- Tree before 'n after stamp + die sets
- Happy village stamp + die sets
- Spooky village stamp + die sets
- Winter village stamp + die sets
- Crunchy leaf ink
- Jet black ink
- Robin's egg + blueberry smoothie + pesto + ripe banana pattern papers from the Spiffy speckles 6x6 paper pack
- Carnation pattern paper from the Perfectly Plaid Spring 6x6 paper pack
- Woodgrain cardstock
- Kraft cardstock
- Cilantro cardstock
- White cardstock
- Noble fir cardstock
- Paper bag cardstock

OTHER SUPPLIES
- Spectrum Noir markers

Magengo - Hungara Bungara - Double Slider Surprise Card

samedi 24 août 2019

Hey there,

I'm back with a double slider card featuring a bunch of cute Indian cats from the Hungara Bungara digital stamp set. These little guys are just so fun, right?


Like every time I work with digital stamps, I started by printing my images on Neenah solar white cardstock using my Epson printer. Next I cut them using my Scan n cut machine, and colored them using my alcohol markers.


When the coloring was done, I cut all the double slider elements I needed to build my card: two pocket pieces, two panel pieces, and a track piece. All out of bristol cardstock.


I chose some distress inks: cracked pistachio, evergreen bough, peacock feathers, broken china, chipped sapphire and black soot, and I applied them on one of the pocket pieces and on both small panels. When the ink blending was done, I splattered water on my panels, dried it using a paper towel, and added drops of white paint to create stars.


Next I cut a plastic strip that I attached around my track piece using double sided tape, and attached my small panels. I attached both pocket pieces together, adhered my track piece inside, and closed the pocket. And I forgot to cut notches on the sides of my pocket panel so I just used a punch to fix my mistake.


To be able to pull the panels, I die cut two tabs that I colored using chipped sapphire and black soot distress inks, and attached them at both ends of my panels. And then I stuck all my images down using glue dots. I layered three different papers and cardstocks, and finally attached my double slider using one layer of foam tape.

VIDEO

Below or here


SUPPLIES
- Double slider surprise die set by Lawn Fawn
- Spectrum Noir markers
- Distress inks: cracked pistachio, evergreen bough, peacock feathers, broken china, chipped sapphire, black soot
- Versamark ink
- White embossing powder by Hero Arts
- White paint by Hero Arts
- Black cardstock by Simon Says Stamp
- Plaid paper by Lawn Fawn
- Peacock cardstock by Lawn Fawn
- Neenah solar white cardstock (for the images)
- Strathmore bristol cardstock (for the background)

Halloween Card Series w/ Hello Bluebird - Ghost Stories - Pull Tab Card

mercredi 21 août 2019

Hello there,

It's been a little while since my last Hello Bluebird card so I'm very happy to share this one today. It's an interactive Halloween card, so I hope you'll like it.


To start, I stamped my images on Neenah solar white cardstock using memento tuxedo black ink, I cut them using my Scan n cut machine and colored them using my Spectrum Noir markers.

When the coloring was done, I started creating my night sky. I cut a 5,5 x 4,25" panel out of Strathmore bristol cardstock, as well as a grass border and cloud border out of black cardstock. The cloud border will represent bushes and I used it as a guide to know where to start inking my panel. The distress inks I used are tumbled glass, faded jeans, chipped sapphire and black soot, and I went from the lightest at the bottom to the darkest at the top.


When the blending was done, I splattered water on my panel and dried it using a paper towel. And I also added droplets to my night sky using tumbled glass, faded jeans and black soot mixed with water.

I wanted to add light reflection to my borders so I simply applied white ink at the very top of those elements. And the final touch to my background pieces was to white heat embossed my sentiment and two cute spiders on the grass border.


Next I traced a pencil mark right in the middle of my panel at the bottom and die cut a slot that will be hidden by the cloud border. And I also die cut a notch at the top of my panel, in the middle as well.

I die cut the pull tab element and applied double sided tape on the tabs, and I put it through the slot from the back of my panel.

Next I die cut the sleeve, folded it on the score lines and attached it at the back of my panel. This way, the pull tab mechanism will go up and down without deviating on the sides.

I trimmed off the pull tab, and attached the remaining piece of night sky at the top, as well as a black arrow to tell the recipient of the card to pull.

Next I adhered the grass border to the cloud border using foam tape, and I also attached the images using foam squares, liquid glue and 3mm glue dots.

The tabs were a little bit too large for the small ghost so I simply cut them in half. I cut a small strip of paper that I attached on those tabs. This way I will be able to adhere a longer strip at the bottom for the other ghosts. I attached the small ghost, next I adhered a long strip at the bottom of the tabs, I applied tape, and then I attached the remaining ghosts.


I applied two layers of foam tape at the bottom of my panel, making sure it wasn't touching the ghosts or the mechanism, and I attached my borders and images. I attached my panel to a black card base using one layer of foam tape, added white highlights on the images, and white nuvo drops in the center of each flower to finish the card.


VIDEO
Below or here

HELLO BLUEBIRD SUPPLIES
- Halloween fun stamp set
- Halloween party stamp set
- Fall friends stamp set
- Puddle play stamp set
- Grassy knoll die set

OTHER SUPPLIES
- Let's toast pull tab add-on by Lawn Fawn
- Spectrum Noir markers
- Distress inks: tumbled glass, faded jeans, chipped sapphire, black soot
- White pigment ink by Simon Says Stamp
- Clear embossing ink by Lawn Fawn
- White embossing powder by Hero Arts
- Sakura white gel pen
- Sakura black gel pen
- Simply white nuvo drops by Tonic Studio
- Black cardstock from Simon Says Stamp
- Neenah solar white cardstock (for the images)
- Strathmore bristol cardstock (for the background)

Holiday Card Series 2019 w/ Hero Arts & Arteza - Watercolored Nights Skies

samedi 17 août 2019

Hey there,

I'm back with a trio of Christmas cards featuring a stamp set by Hero Arts and watercolors by Arteza. Feel welcome to watch the video below to see those watercolors in action.

If you're interested in buying those water colors or other supplies from Arteza, know that you get 10% off your order with the code MarineSimon2. And it's valid until September 15th ^^

To try those water colors, I thought that creating night skies would be nice, so I tape watercolor paper on a wooden board, adhered a mask in the middle to create the moon, applied a generous amount of clear water and started playing with the paints.

For the first background, I used viridian green and prussian blue. I first applied viridian green around the mask and then added prussian blue on the rest of the panel. To darken my sky I added black towards the edges, and next I came back with the other colors to blend everything nicely.

I used my heat tool to dry the paint, and again I played with the same colors to get a more vibrant result. And to added titanium white around the Moon to add more light.


For the second background, I used yellow pale, orange yellow, vermilion red, lilac and titanium white. Like the first background, I applied a first layer of paint that I dried using my heat tool, and then I applied a second layer.


For the third background, I used rose, lilac, noir and titanium white.


I chose the trees from the Winter Silhouettes stamp set by Hero Arts because they were just perfect for what I had in mind. I stamped a whole bunch of trees on my panel using black versafine ink, following the edges. This way it's like we're in the clearing, looking up to the moon.

When all the trees were stamped, I used my white gel pen to scribble on the trees to give the illusion of snow on the branches. Every winter night sky need snow so I splattered white paint on the panel. And after removing the mask, I stamped my sentiment using the same black ink. Finally I adhered my panel to a black card base.

VIDEO
Below or here

SUPPLIES
- Winter silhouettes stamp set by Hero Arts
- Black versafine ink
- Black cardstock by Simon Says Stamp
- Sakura white gel pen
- White paint by Hero Arts
- Masking paper by Simon Says Stamp

Halloween Card Series w/ Isabel Cristina Stamps - Hocus Pocus - Center Picture Window Card

mercredi 14 août 2019

Hello there,


Today I'm starting a Halloween series with this new digital stamp set called Scary Bellas and designed by Isabel Cristina Stamps.


I first started by die cutting all the elements I needed to build a center picture window card: I cut a longer panel than the original one, just to be able to feature more images, one center picture window element, and some curtain elements that are from the shadow box card theater add-on by Lawn Fawn.

I started with the card base. I applied hickory smoke distress ink on one side, and next I used a stencil and black soot distress ink to create a brick wall. I also added more black soot at the very top, just to add more depth to my panel.


I colored the center element using the same inks, and also cut two pieces out of wood pattern paper that I attached at the bottom of my panel to create the floor.

Next I used the oval die to create a window in my center element, and I cut an insert element out of the same wood pattern paper as before. I folded it in half, and folded the tabs, and I did the same thing on the center element: I folded it un half, folded the tabs using my bone folder, next I applied double sided tape on the tabs, I folded the right tab of the center element, aligned it with the card base, and pressed down to stick the tab down. I folded the right tab of the insert piece, aligned it with the card base, and pressed down to adhere the tab.


Next I folded the insert piece and the center element in half, removed the back of the tape, and folded the card base to close it. And to get a consistent scenery, I added another piece of wood pattern paper at the bottom of the center element.

Next I cut small panel corresponding with one half of my card base and die cut a window right in the middle of it to create a frame. For the sentiment I first applied twisted citron and then some mowed lawn in the edges to darken. And for the frame, I first applied mowed lawn and darkened it using black soot on the edges. I also splattered drops of black soot on the edges, as well as some drops of white paint. I stuck the frame down to the sentiment, trimmed off the excess of paper, I attached a black panel at the back of my card, and finally adhered my hocus pocus panel to the front of my card.


All my images were printed on neenah solar white cardstock using my epson printer and I used my alcohol markers to color them. When everything was colored, I used the T shape die to create a score line right in the middle of the cauldron.


And I used mountain top dies to create flames that I attached on the cauldron. For an extra spooky element, I applied green nuvo drops at the top of the cauldron to give the illusion of something stewing inside. Next step was to attach everything using glue dots. Also, I wanted a bubble effect above the cauldron, so I cut small strips out of clear acetate, and applied the same green nuvo drops on each end. And once dry, I attached them at the back of the cauldron. And finally I adhered the cauldron on my panel using liquid glue.

VIDEO
Below or here

SUPPLIES
- Scary Bellas digital stamp set by Isabel Cristina Stamps
- Center picture window die set by Lawn Fawn
- Shadow box card theater add-on by Lawn Fawn
- Stitched mountain border die set by Lawn Fawn
- Spectrum Noir markers
- Distress inks: hickory smoke, black soot, twisted citron, mowed lawn
- Brick stencil by My Favorite Things
- White paint by Hero Arts
- Wood pattern paper from my stash
- Neenah solar white cardstock (for the images)
- Strathmore bristol cardstock (for the background elements)
- Black cardstock from my stash
- Sakura white gel pen
- Apple green nuvo drops by Tonic Studio

Lawn Fawn - Mysterious Treasure - Center Picture Window Card

samedi 10 août 2019

Hey there,


In today's video, we go on an adventure on a pirate ship looking for a mysterious treasure. And to create this card, I used the center picture window die set and add-on for the first time, as well as some other stamp and die sets.


So I started by die cutting all the elements I needed to build my scene, all out of bristol cardstock: two card bases, one for the background and one that I will use for the front of my card and to cut borders, a center element, and two insert pieces.


To begin, I took one card base and applied tumbled glass and salty ocean oxide inks on one side. Next I cut the second card base in half, and used the same inks to color one half. And of course, I never leave a background without adding texture so first I splattered water on my panels, used a paper towel to absorb it, and then i used the same inks mixed with water to create tiny drops on my panels.


Next I took the other half of my second card base to die cut a hill border and a wavy border. I applied cracked pistachio on the wavy border and added lucky clover at the bottom to create more depth. I also stamped tiny waves on the border. And then I applied antique linen and vintage photo oxide inks on the hill border, and added drops of the same inks to create sand texture.


When everything was dry, I used the oval die to create a window in the small blue panel.


And I applied twisted citron, cracked pistachio and lucky clover oxide inks on the other side of my card base to create the inside of the card.


Here's how I imagine the card: on the front we'll have a pirate ship approaching the coasts of a desert island, the pirates are looking for a treasure and maybe they will find it on this island, and on the inside, we'll have two pirates who have found the treasure that was hidden in a cave deep inside the jungle.


A cave is supposed to be dark so I needed to create a black background for it. So I aligned the middle line in the center picture window element with the middle line on the panel and used a pencil to mark where the tabs are supposed to be. I traced vertical lines from those pencil marks, adhered some washi tape and applied black soot oxide ink in the middle of my card base to create the back of my cave.


Next I colored the last elements: two hill borders and also the insert pieces. Contrary to the front of the card that takes place on the beach, the inside of the card takes place in the jungle so I used vintage photo and ground espresso to get a dirt effect.


I cut a center picture window element out of licorice cardstock. I knew it would be covered but still, I wanted it to match the black background. And I used the oval die to create an opening. I applied double sided tape on the tabs, folded the element in half right on the score line, and folded the tabs on the score lines using my bone folder. And I did the same thing with the insert elements.


Next step was to assemble everything. I started with the dirt borders that I attached at the bottom and 2 or 3 millimeters on the black part. This way the edges of the borders will be hidden behind the center picture window element. I folded the card base in half right on the score line, I removed the back of the tape on the right tab, folded this tab, aligned the score line of this black center picture window element with the middle line on the card base, and pressed down to adhere the tab to the card base. And I did the same thing with the insert pieces.


Next I folded those three elements in half, removed the back of the tape, and closed the card base to adhere everything. Next I assembled the outside by simply layering the different elements and attaching them on the front of the card using foam squares.

All the images were stamped on neenah cardstock using jet black ink and  colored them using my alcohol markers. When everything was colored, I cut them using the coordinating dies, and attached them using glue dots.

I wanted the chest to be perfectly centered in the center picture window so I used the T shape die to create a nice score line right in the middle of it of the chest. But before attaching this chest, I used the rocks to create the outside of the cave. I cut them or folded them and adhered them using glue dots. I added ivy leaves to match my jungle theme, and attached the chest inside the cave. And to get more of this tropical/jungle theme, I glued additional flowers and leaves between the rocks.

For my sentiment, I first used the banner die from the set with black licorice cardstock, and white heat embossed "you're a treasure" on it. I folded it in half and adhered inside my card using liquid glue. And to totally complete the card, I cut a rectangle out of white cardstock using the die from the set, and attached it at the back.


VIDEO
Below or here

LAWN FAWN SUPPLIES
- Center picture window die set + add-on
- Simple stitched hillside borders
- Stitched simple wavy borders
- Ahoy, matey stamp + die sets
- Critters in the jungle stamp + die sets
- Mermaid for you stamp + die sets
- Oh gnome stamp + die sets
- Critters from the past stamp + die sets
- Black licorice cardstock
- Jet black ink
- Glue tube
- Clear embossing ink
- Teflon bone folder
- White embossing powder

OTHER SUPPLIES
- Spectrum Noir markers
- Oxide inks: tumbled glass, salty ocean, cracked pistachio, lucky clover, antique linen, vintage photo, twisted citron, black soot
- Strathmore bristol cardstock
- Sakura white gel pen

Miss Ink Stamps - Swinging Pinata - DIY Swing Card

mercredi 7 août 2019

Hello there,

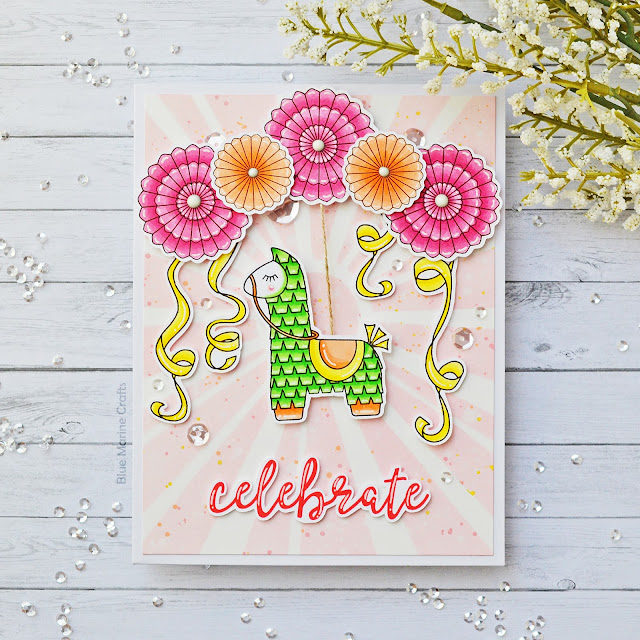
Today is the first wednesday of the month so I'm happy to share with you a new card for Miss Ink Stamps. I used the streamers stamp set, the pinata party stamp set and also the sunburst stencil to create a fun and colorful card.


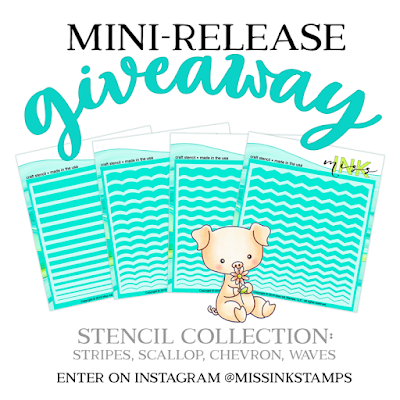
There are also four new stencils available at Miss Ink Stamps, and a set of these is part of a giveaway, so check MIS instagram for a chance to win them. Good luck!


I started with the images. I stamped them on Neenah solar white cardstock using memento tuxedo black ink, and cut them using my Scan n cut machine. And of course I used my beloved alcohol markers to color them.


When the coloring was done, I used the sunburst stencil to apply spun sugar oxide ink on a bristol panel. And with the stencil still in place, I splattered drops of dried marigold, mustard seed and worn lipstick oxide inks to add a pop of color and to match my images.


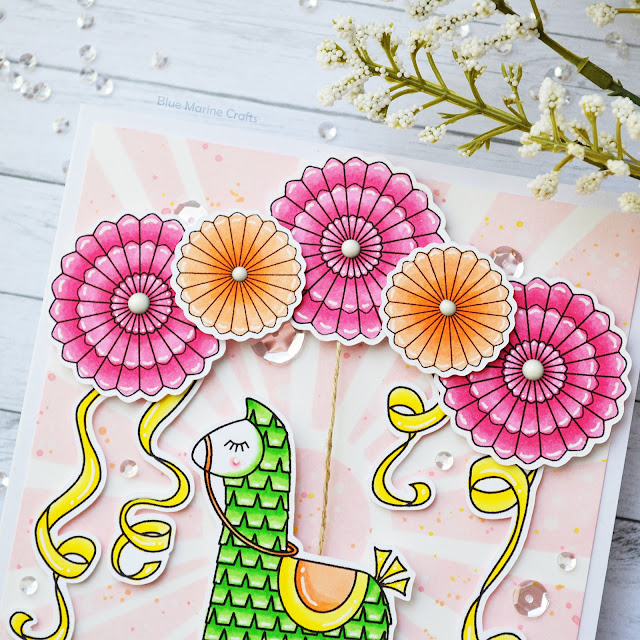
I placed the rosettes at the top of my panel, marked the center of the middle rosette using a pencil, and punched a hole on this pencil mark. And I also punched a 1,5cm circle out of some cardstock.


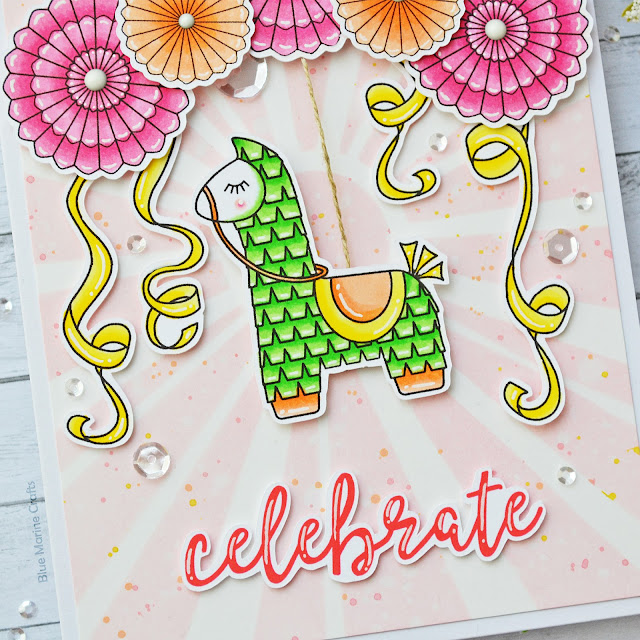
Next I took some twine and attached one end on a large glue dot. On this glue dot I stuck a cent, and I adhered this cent at the back of the piñata.


I took a foam square that I trimmed to create a foam circle, placed the 1,5cm circle behind the hole in my panel, and adhered the foam circle. To get more stickiness, I stuck a small glue dot on this foam circle, attached the twine, I added another small glue dot to secure the twine, and finally attached a second circle to be able to stick the middle rosette.


Next I attached the other rosettes and the streamers using foam squares. The streamers are used to stop the piñata from swinging to high. I attached my sentiment using foam squares, added white highlights on the images, adhered my panel to a white card base, and finally applied white nuvo drops in the center of each rosette and glued some clear sequins here and there.


VIDEO
Below or here


SUPPLIES
- Pinata party stamp set
- Streamers stamp set
- Sunburst stencil
- Spectrum Noir markers
- Oxide inks: spun sugar, dried marigold, mustard seed, worn lipstick
- Memento tuxedo black ink
- Clear sequins by Pretty Pink Posh
- Simply white nuvo drops by Tonic Studio
- Twine from Stampin Up!
- Sakura white gel pen
- Neenah solar white cardstock (for the images)
- Strathmore bristol cardstock (for the background)

Magengo - Funny Frogs

samedi 3 août 2019

Hey there,

Today I present to you a new digital brand called Magengo and available on Etsy. I'm very happy to help promote this lovely family business and I hope you'll like my future projects.


So, I started with the Funny Frogs set. I printed some images, cut them using my Scan n Cut machine and colored them using my alcohol markers.


I cut a bristol panel measuring 8 x 4-1/4" and picked four different oxide inks that, once blended, will match the frogs: tumbled glass, twisted citron, cracked pistachio and squeezed lemonade, and I applied them on my paper.


Next I splattered drops using salty ocean, lucky clover, mowed lawn and mustard seed. They're a little bit darker than the ones I used to color the panel, it's just to add some contrast.

One of the frog is holding a leaf above his head so I thought it would be fun to add rain to my project, so I used the Rainy Backdrop from Lawn Fawn to cut a bunch of raindrops out of my panel. And I wanted to add more cuteness to my card so I attached my colorful panel to a white glitter panel using liquid glue.


Next I die cut a wavy border that I colored using tumbled glass and cracked pistachio oxide inks. This way my frogs won't be floating in the air. I stuck this border at the bottom of my panel, and attached the images using foam squares.


I colored some cardstock using a pink marker, and white heat embossed my sentiment on it. And finally I trimmed it to create a banner that I attached on the right side of my panel.

VIDEO
Below or here

SUPPLIES
- Spectrum Noir markers
- Oxide inks: tumbled glass, cracked pistachio, twisted citron, squeezed lemonade, salty ocean, lucky clover, mowed lawn, mustard seed
- Rainy backdrop landscape die by Lawn Fawn
- Stitched simple wavy borders die set by Lawn Fawn
- Pixie dust glitter cardstock by Lawn Fawn
- Toadally awesome stamp set by Lawn Fawn (for the sentiment)
- Versamark ink
- White embossing powder by Hero Arts
- White posca pen
- Neenah solar white cardstock (for the images)
- Strathmore bristol cardstock (for the background)
- White cardstock by HobbyCraft (for the card base)