Under The Sea Card Series - Deep into the Ocean

samedi 30 décembre 2017

Hello there,

Today I'm back to show you the second card I made using liquid pigment inks and alcohol. The process is the same as my first alcohol background card (the one with the flowers ^^), here it is:


I first spayed alcohol on a piece of glossy paper (or photo paper), put some colored drops, sprayed again with alcohol and then moved the paper to mix all the colors together. Put more drops and alcohol, and mixed again. And let the panel dry overnight.


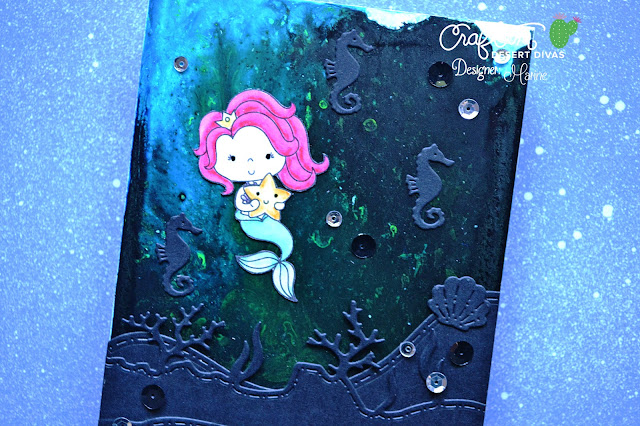
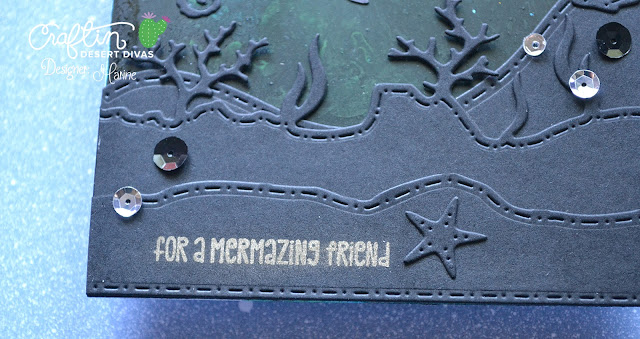
Once I saw the result, I immediately thought of a deep ocean. So from black cardstock, I die cut a coral border, a hill border and another one from a tree border (I just removed the trees), and glued these at the bottom of my panel.

Stamped my sentiment using versamark ink, applied silver powder on top and clean it to reveal a shiny sentiment.


I stamped a cute little mermaid, colored her using my zigs markers, fussy cut her and glued her on my panel. From back cardstock, I also die cut three sea horses, a shell and a starfish. Glued these on the panel.

Attached my panel to a white card base, simply added some sequins here and there and clear glitter to the mermaid hair and tail to finish the card.

VIDEO
Below or here

CRAFTIN DESERT DIVAS SUPPLIES


OTHER SUPPLIES
- Liquid pigment inks from Aladine
- Alcohol from the supermarket
- Zigs markers
- Glossy paper from my stash
- Black cardstock from Simon Says Stamp
- Silver perfect pearls powder from Ranger

Craftin Desert Divas - Liquid Pigment Ink + Alcohol Background

mercredi 27 décembre 2017

Hey there,

Today I'm here to share with you a card that is pretty different compared to my other projects. It was my first time using liquid pigment inks with alcohol, and getting messy with these supplies was so fun!

When I saw the result after drying, the background immediately reminds me of paintings from Monet (without pretension, of course ^^) so I decided to add flowers to kind of match one of his fabulous creations.


So I first started by spraying alcohol on glossy paper (the kind of paper we use to print photos on), next I applied different colors of liquid pigment inks, sprayed a lot of alcohol again on top and moved the paper to mixed the colors together.


Did this process two or three times to get a good coverage and until I was happy with the result. Let  the panel dry overnight.


I took all the flower and leaf dies I have from CDD and die cut a bunch from bristol smooth cardstock. Colored them with my zig markers trying not to be too heavy to get kind of a soft and pastel look.


I heat embossed my sentiment using versamark ink and gold embossing powder, attached the panel to a white card base and finally glued all the die cuts on the panel using glue dots and liquid glue, trying to get a nice harmony.

VIDEO
Below or here


CRAFTIN DESERT DIVAS SUPPLIES


Holiday Card Series 2017 - Something Retro

jeudi 21 décembre 2017

Hello there,


Today I'm sharing with you my last holiday cards, and I have plenty! I discovered a few weeks ago Lili of the Valley, and I fell in love with their digi stamps, particularly the Christmas ones! They have a little something, something retro that I really love.


The process for these cards was very easy: I edited the images on my computer, printed everything, colored each image using my zig markers and used one or two die to frame the little scenes.


I love them all, but my favorites are definitely the one with the fox and the squirrel sharing presents, the one with the tit bird on a branch of holly, and the one with the three little fairy girls.


VIDEOS

*

SUPPLIES
- Christmas digital stamps from Lili of the Valley
- Zig clean color real brush pens
- 3mm + 6mm clear droplets from Pretty Pink Posh
- Clear glitter pen from Spectrum Noir

Holiday Card Series 2017 - Simple Foiling

samedi 16 décembre 2017

Hello there,

Today I'm sharing with you four foiled cards. They're very simple, but foil makes them very shiny and so beautiful I think.


So I first started by editing the digital images and sentiments on my computer using Photoshop, and then printing them on my laser printer.


Framed the panels using a scalloped rectangle die.


Next I covered each panel with a sheet of foil, and put them through my laminator. And tadaaaa!


Attached each panel to a white card base using fun foam to add some nice dimension, and that was it.


VIDEO
Below or here

CRAFTIN DESERT DIVAS SUPPLIES


OTHER SUPPLIES
- Foil papers from Heidi Swapp
- White cardstock from HobbyCraft

Craftin Desert Divas - Spinning into space

mercredi 13 décembre 2017

Hey there,

Here is my last card for Craftin Desert Divas December release featuring the new "Far Out" stamp set. It's a spinner card because what is funnier than spining into space?


I first started by creating the background using different colors of distress inks that I blended together on a piece of bristol smooth cardstock.


Then, in this galaxy panel, cut a large ring using two different sizes of circle dies. I cut a piece of black cardstock and glued the ring in the middle.

I used the same smaller circle die and another one, bigger than the large one previoulsy used to die cut another ring but this time from acetate (please watch the video if all this doesn't sound clear ^^)


Placed that acetate ring on the galaxy panel, and attached the middle part using double sided foam tape.

Colored the images, fussy them, created a moon, and die cut some little stars and circles from glitter cardstocks. Placed the images along the acetate ring, and took a picture so I remember where to glue everything.


Removed the images, and attached foam squares where I wanted them to go. And I attached the last pice of my galaxy panel using double sided foam tape. Removed all the backs of the foam squares and glued the images and little die cuts in place.

And to finish the card, I simply added a bunch of little dots on my panel using a white gel pen because what's a galaxy sky without stars?

VIDEO
Below or here

CRAFTIN DESERT DIVAS SUPPLIES


OTHER SUPPLIES
- Distress inks from Tim Holtz: picked raspberry, mustard seed
- Spectrum Noir alcohol markers
- Black cardstock from HobbyCraft
- Silver glitter cardstock from American Crafts
- Dark silver glitter cardstock from Action
- Acetate from my stash
- White gel pen from Uniball

Valentine Card - Souvenirs

mardi 12 décembre 2017

Hello there,

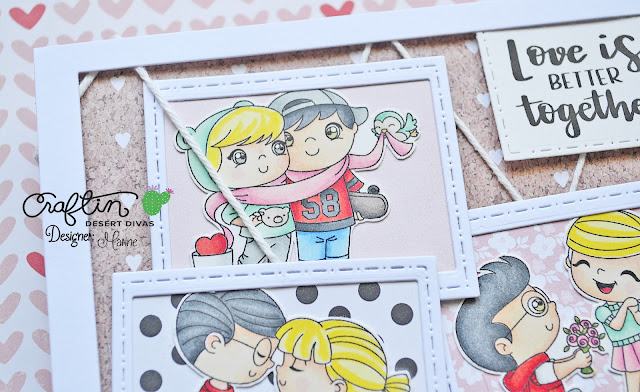
Here is my second card showcasing this adorable new stamp set called "Better Together". It's definitely my favorite from this release! When I saw these cuties, I immediately thought they were the same people but at different step of the life: teenage love, proposal and a lifetime together. That's why I created sort of a board to pin their photos. Hope you'll like this card!


I first started by die cutting three frames from white cardstock using dies from two different die sets. I also die cut three rectangles from pattern papers to use as backgrounds for my photos.


I fussy cut the images and colored them using my alcohol markers. Then I glued each image on a pattern background, and attached the white frames to finish the photos.


Used a rectangle die to create a large frame from white cardstock, and attached threads to a piece of cork pattern paper. Once all the threads were in place, I attached the large frame using foam squares.


Attached my sentiment in the top right corner of my panel, glued the three little frames using large glue dots, and attached my panel to a white card base to finish the card.

VIDEO
Below or here


CRAFTIN DESERT DIVAS SUPPLIES

- Better Together stamp set

- Box Card die set

- Fancy Frame die set

OTHER SUPPLIES
- Spectrum Noir alcohol markers
- Pattern papers from my stash
- White cardstock from HobbyCraft
- Thread from my stash

Craftin Desert Divas - Rainbow Party - Interactive Card

lundi 11 décembre 2017

Hello there,

Today I'm back with this colorful interactive card. It's quite simple to make and the effect is amazing! This card features a stamp from the new "Celebration Trolls" stamp set by Craftin Desert Divas.


I first started by creating the background. And for that, I simply attached strips of thin masking tape to a piece of white bristol cardstock using the grid of my mat so I get even triangles. Then I applied rainbow colors of distress inks on each triangle. I also colored my image, and fussy cut it.

Then I cut a thin strip of acetate, and die cut three scalloped borders. Attached one border at the top of my panel using foam squares.


On another border, I pierced a small hole right in the middle. Did the same thing at the very bottom of the acetate strip. Placed the strip on the border and attached both pieces using a brad so the piece of acetate can move from left to right and right to left. Attached that second border at the bottom of my panel, and glued the third on top of it so it kind of hide the brad mechanism.


Attached my image to the strip using glue dots, then my panel to a white card base, glued my sentiment in place and added clear glitter to the troll's hair to finish the card.

VIDEO
Below or here

CRAFTIN DESERT DIVAS SUPPLIES


OTHER SUPPLIES
- Distress inks from Tim Holtz: wilted violet, salty ocean, twisted citron, mustard seed, spiced marmalade, candied apple
- Bristol smooth cardstock from Strathmore
- Spectrum Noir alcohol markers
- Clear glitter pen from Spectrum Noir