Affichage des articles dont le libellé est technique: hotfoil. Afficher tous les articles

Pretty Pink Posh - Rainbow Holidays

lundi 28 octobre 2024

Hi there,

I'm thrilled to be back with this super duper extra colorful and bright card showcasing the Christmas Light Garland die from the Pretty Pink Posh October 2024 Release. When I first saw this die, I immediately visualized rainbow garlands, just like the ones my grandfather had on his Christmas tree. It was nice to have those sweet memories while working on this card.


I started with the background and cut a 5,5 x 4,25 inches Strathmore bristol smooth panel that I colored with oxide inks. First, I created a base using, clockwise, kitsch flamingo, dried marigold, squeezed lemonade, twisted citron, salvaged patina and shaded lilac. Next I placed the Cascading Snowflakes stencil on top of my panel, and applied picked raspberry, carved pumpkin, fossilized amber, mowed lawn, peacock feathers and wilted violet for a tone on tone look. I splattered water all over my panel and dried it using a paper towel. I mixed some copic opaque white ink with water and used a slim brush to add splatters on my panel, and I did the same with fossilized amber distress spritz to add gold splatters on my piece of paper.


I set the panel aside to dry, and cut all my Christmas Light Garland pieces: four strings out of white cardstock and multiple light bulbs out of colored cardstock. And for the light caps, I found the perfect die from Big Dump Truck, I cut some of them out of gold glitter cardstock and some out of dark yellow cardstock. Next I assembled everything: I attached the light bulbs on the white garlands in a rainbow order using liquid glue, I added a cap on each bulb, and stuck each garland to my panel using 1mm foam squares.


I added liquid glue on each bulb and sprinkled fine glitter to make them all sparkle, and while the glue was drying, I worked on my greeting. I foiled my Hot Foil Happy Holidays sentiment in gold on white cardstock, and cut each word using Happy Holidays Shadow dies. And I wanted to add a subtle border to my words, so I cut two Happy Holidays Shadows out of vellum, glued those vellum pieces behind my gold foiled words, and finally attached my greeting in the middle of my panel using 2mm foam squares. I stuck my panel to a white card base, added highlights to the light bulbs and caps using a white gel pen, and finished my card with a scattering of Iridescent Mini Star Confetti all over my panel.


PRETTY PINK POSH SUPPLIES
- Christmas light garland die set
- Big dump truck die set
- Hot foil happy holidays
- Happy holidays shadow die
- Iridescent mini star confetti
- Cascading snowflakes stencil


OTHER SUPPLIES
- Oxide inks: kitsch flamingo, picked raspberry, dried marigold, carved pumpkin, squeezed lemonade, fossilized amber, twister citron, mowed lawn, salvaged patina, peacock feathers, shaded lilac, wilted violet
- Copic opaque white ink
- Fossilized amber distress spritz
- Fine glitter by Lawn Fawn
- Gold glitter cardstock by Concord & 9th
- Colored cardstock by The Stamp Market
- Vellum by Lawn Fawn
- Gold foil by Spellbinders
- Strathmore bristol smooth cardstock

Lawn Fawn - Monochromatic Halloween Ta-Da Diorama

jeudi 5 octobre 2023

Hey there,

I'm thrilled to be back on Lawn Fawn YouTube Channel & Blog with this new monochromatic Halloween card showcasing the amazing Ta-Da Diorama die set! Love this new set so much! It also features Spooky Village and Booyah, which are probably my most favorite Halloween stamp sets from Lawn Fawn.


As very often I started by stamping all my images on 80lb Neenah solar white cardstock using Jet Black ink, I cut them all using the matching dies, and used my Graph'it brush grey and black markers to color everything. And once the coloring was done, I added highlights and details on the images using a white gel pen.


Next I silver foiled a Black Licorice piece of paper using the Starry Sky Background Hot Foil Plate, and then used the main piece die from the Ta-Da Diorama die set to a panel out of it, and this way create the back panel of my diorama. I cut another panel using that same die again out of Black Shimmery cardstock, and used the window creator die from the set to cut an opening in the center of my shimmery panel. I cut two side panels out of a Let It Shine Starry Skies grey pattern papers. Cut two insert pieces out of grey Woodgrain cardstock. And finally cut two band pieces.

I assembled all those different pieces to build my diorama, and please watch the video down below to see the whole process. I always more comprehensible with images than with words ^^

Once my diorama was built, I attached my images both on the inside and on the outside of the diorama. For the images on the inside I started with the ones on the back panel using 1mm foam squares, and for the ones on the insert pieces I used 3mm glue dots and liquid glue. And for the images on the outside (the ones on the front panel) I used 1mm and 2mm foam squares and liquid glue.


Next I worked on the greeting. I cut a Simple Wavy Banner out of Black Licorice cardstock, I stamped the "Have a faboolous day" sentiment from Tiny Halloween using Clear Embossing ink and Silver Embossing powder, and finally attached the banner at the top of Ta-Da Diorama using 1mm foam squares.


VIDEO


LAWN FAWN SUPPLIES

Stamp sets
- Booyah
- Spooky village
- Spooktacular
- Costume party
- Tiny Halloween
- Happy harvest
- Eggstraordinary Easter

Die sets
- Ta-Da diorama
- Simply wavy banner
- Scalloped box card pop-up
- Double slider surprise

Misc
- Starry sky background hot foil plate
- Jet black ink
- Clear embossing ink
- Silver embossing powder
- Black licorice cardstock
- Black shimmery cardstock (neutrals pack)
- Let it shine starry skies grey pattern paper


OTHER SUPPLIES
- Graph'it brush markers
- Sakura white gel pen
- 80lb Neenah solar white cardstock (images)
- Ribbon from my stash

Waffle Flower - Under The Tree Cards

samedi 9 septembre 2023


Hi there,

I'm thrilled to be back with two more cards I made using items from the Waffle Flower September 2023 Release. Today I'm showcasing the ever so cute Under The Tree stamp set, jam-packed with adorable characters, critters and plenty of small images!

Waffle Flower is having a blog hop + giveaway to celebrate this brand new release, and it ends on Sept 11th at 11:59pm EST, so before scrolling down the page, make sure to check my previous Folk Art blog post for fun, inspiration, and chances to win some of these new release goodies!


Today's cards were made following the same steps:

1) Foil the Swag Background Foil Plate on Strathmore bristol smooth cardstock, use the Swag Coloring Stencil and distress inks (listed down below) to add colors to the panel, and trim the piece of paper into a 5,5 x 4,25 inches panel
2) Stamp the images from Under The Tree on white cardstock using black ink, color them using your favorite medium, add highlights using a white gel pen, and cut everything using the matching dies


3) Attach the images on the panel using 1mm foam squares
4) Create the greeting by using the Christmas Tree Subsentiments die cuts or Holiday Cheer stamp set, and stick it on the panel using 1mm foam squares again


Once again, I had a blast making those two cards, I really love those cute characters and critters, they're just so fun! Thanks so much, Waffle Flower, for having me, I had such a great time working with your brand new products!


WAFFLE FLOWER SUPPLIES

- Under the tree stamp set
- Under the tree matching dies
- Holiday cheer sentiments stamp set
- Holiday cheer sentiments matching die
- Christmas tree subsentiments die cuts
- Swag background foil plate
- Swag coloring stencil


OTHER SUPPLIES

Under the tree card: blue
- Distress inks: tumbled glass, peacock feathers

Under the tree card: pink
- Distress inks: spun sugar, worn lipstick

Both
- Foil by Spellbinders
- Black licorice cardstock by Lawn Fawn
- Clear embossing ink by Lawn Fawn
- Fine white embossing powder by Hero Arts
- Sakura white gel pen
- Strathmore bristol smooth cardstock (background)
- Transotype perfect coloring paper (images)

Waffle Flower September Release Blog Hop

mardi 5 septembre 2023


Hello there,

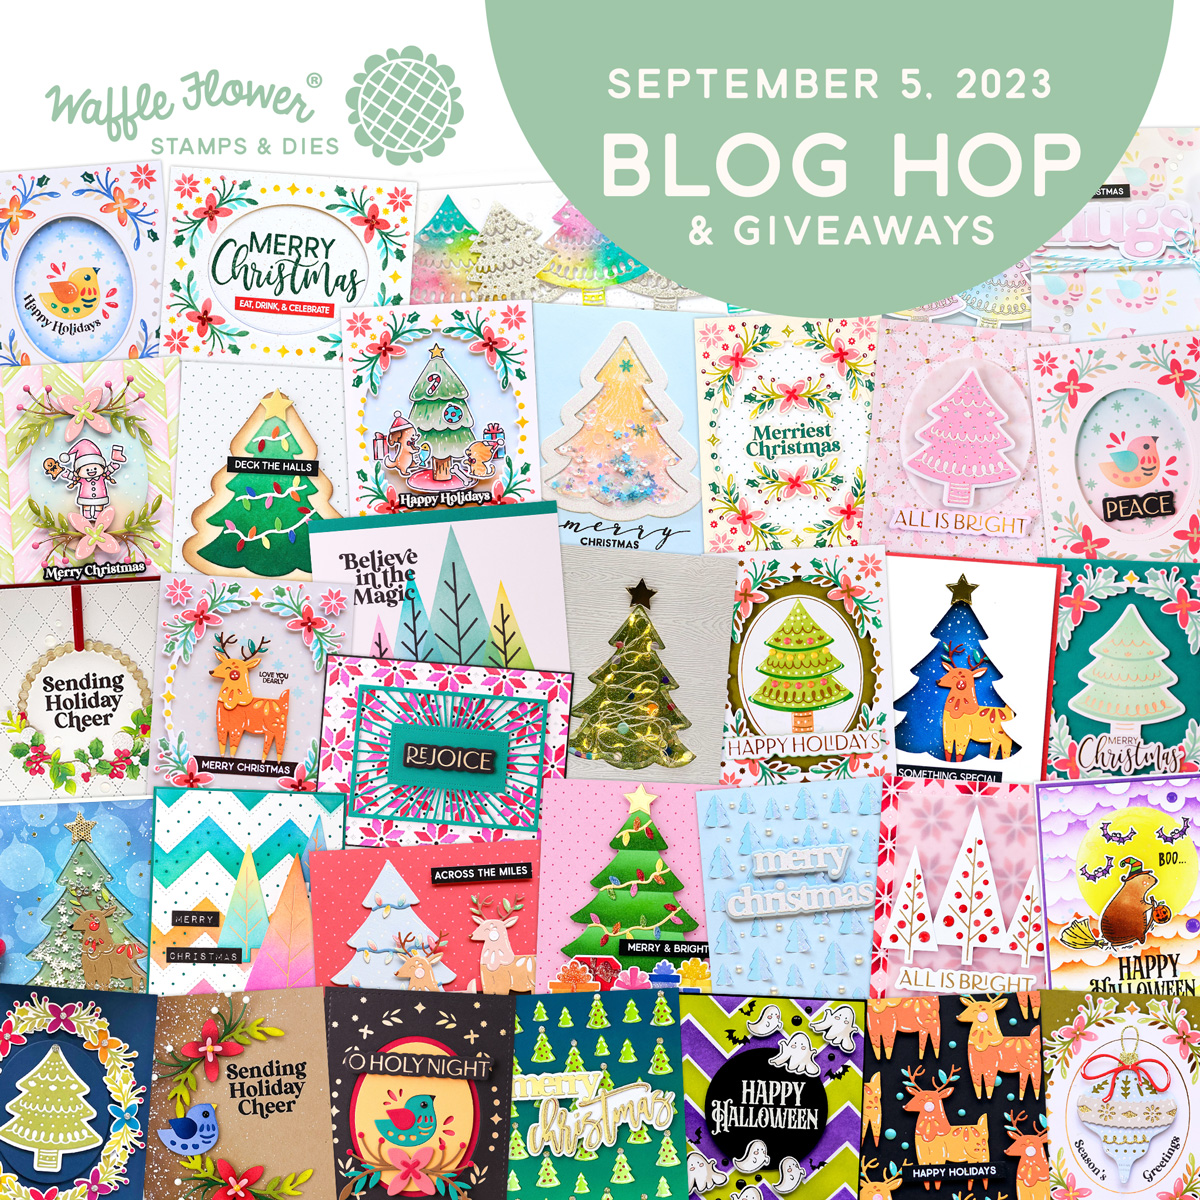
Welcome to the Waffle Flower September Release Blog Hop! I’m so excited to be hopping with the folks from Waffle Flower to show you all the fun new stuff awaiting you at waffleflower.com! Be sure to check out each stop (linked down below) in today’s blog hop for fun, inspiration, and chances to win some of these new release goodies!

• Vicky P
• Marine Simon (me)

For today’s hop, Waffle Flower is giving away $25 gift certificates at every stop of the hop, that’s a total of 3 chances to win! You can leave a comment on this blog and along the hop by 11:59pm EST on Monday September 11th, 2023 for your chances to win. Winners will be chosen at random from the comments and will be announced on the Waffle Flower Blog on Winner Friday 9/11/2023.

Also, from now till September 9th, 2023, all orders placed at waffleflower.com will receive an exclusive Little Stocking die (no code required)

And for those of you who are new to Waffle Flower, they have a Last Chance section on their website that lists many goodies for 25% off until they are gone! This would be a great place to start your collection! And don’t forget to check out their monthly Flash Sales!

***


Now let's talk about the cards I made for the hop, shall we? ^^

If you've been following me for a long time, you already know that I love to stamp and color images to create busy cards. But if you're new here, first of all, welcome to my blog :-) and yes, I'm more of a critter and character kinda girl than die cut pieces.

But I recently started to love making projects featuring die cut elements only, and when I saw the beautiful Folk Art Reindeer die, well, it was love at first sight! And the entire Folk Art collection is absolutely gorgeous, I can't wait to try more of these items!


Both cards were done the same way, here are the different steps:

1) Foil the Folk Art Frame Foil Plate on Strathmore bristol smooth cardstock
2) Line up the Folk Art Frame Stencil on the foiled panel and use distress inks (listed at the end of this blog post) to create beautiful floral clusters, and use the Folk Art Frame matching die to cut the frame
3) Cut a 5,5 x 4,25 inches patterned panel, and stick it to a card base
4) Cut a Fancy Frame, and attach it to the patterned panel using 1mm foam squares
5) Stick the Folk Art Frame pieces on top using 1mm foam squares (2mm foam squares for the oval piece)
6) Cut the Folk Art Reindeer out of two different colored cardstock + mirror cardstock for the antlers, assemble the reindeer, and attach it in the middle of the oval piece using 1mm foam squares
7) Emboss a greeting from Holiday cheer sentiments on whatever cardstock you choose, cut it using the matching die, and stick it under the reindeer
8) Glue a few jems/pearls/sequins around the reindeer, and add a dot of glossy accents on each berry for a last final touch of shine


These cards were so easy and fun to make, I know I already want to make more with different colors. I hope that you like them too, and stay tuned because I will be back very soon with two totally different but yet super cute cards featuring some of the new items from the Waffle Flower September 2023 collection!


WAFFLE FLOWER SUPPLIES

- Folk art frame Foil Plate
- Folk art frame matching die
- Folk art frame stencil
- Folk art reindeer die
- Holiday cheer sentiments stamp set
- Holiday cheer sentiments matching die
- Fancy frame die


OTHER SUPPLIES

Folk art card: turquoise
- Distress inks: festive berries, saltwater taffy, peacock feathers, candied apple
- Silver jewels by Sunny Studio
- Pattern paper from the Flower Marker paper pack by Lawn Fawn

Folk art card: pink
- Distress inks: worn lipstick, spun sugar, mowed lawn, candied apple
- Gold pearls by Pinkfresh Studio
- Pattern paper from the Cupid & Co paper pack by Echo Pack

Both
- Foil by Spellbinders
- Mirror cardstock from my stash
- Colored cardstock by Lawn Fawn + The Stamp Market
- Glossy accents by Ranger
- Clear embossing ink by Lawn Fawn
- Embossing powders by Lawn Fawn
- Strathmore bristol smooth cardstock

Pretty Pink Posh - Monochromatic Ghost Shaker Card

samedi 12 août 2023

Hi there,

I'm so excited to be back with this new monochromatic card showcasing some of the brand new items from the latest Pretty Pink Posh release, including the amazing Ghost Shaker die set. And as you can see, I went for a black + white + silver color palette to achieve a monochromatic look!


I started off by cutting a 5,5 x 4,25 inches black & white stripy panel as a card base. Next I cut a Strathmore bristol smooth panel, slightly smaller than the stripy one, and I used oxide inks to color that panel. I first applied lost shadow all over the panel, next I added hickory smoke and black soot on the edges, and then I added diamond shapes using the Layered Argyle stencil along with black soot oxide ink.

Of course, I added texture to my panel: I mixed black soot oxide ink with water and used a small brush to make splatters on the paper, and I did the same with copic opaque white ink. And once my panel was dry, I attached it to the black & white stripy panel using double sided tape.

Next I worked on the Ghost Shaker, and started by cutting the different pieces: a grey polka dot plain ghost, a vellum plain ghost, a clear acetate plain ghost, and a white ghost frame. I wanted to tone down the grey polka dot ghost so I stuck the vellum ghost on top of it. I attached the acetate ghost at the back of the ghost frame, and added thin foam tape all along the ghost shape. A little bit of Ghostly Friends mix and Sparkling clear sequins inside the ghost frame, and then I stuck the grey polka dot ghost on the foam tape to close my Ghost Shaker.


I wanted to bring more white to my card, so I cut three small white ghosts, as well as three vellum ghosts, using a die from Halloween House, and I attached a vellum ghost at the back of each white ghost to bring more interest. And I added a tiny piece of black cardstock at their back to make their eyes. I also cut a bunch of silver glitter stars using a die from Halloween House and another one from Halloween Mug Additions.

Next I worked on my greetings. I silver hot foiled the Hot Foil Boo Script on black cardstock, and used the Large Boo Shadow coordinating die to cut it. And I silver heat embossed the phrase "Let's spook up some fun" from Sentiment Strips Halloween Strips on black cardstock, and cut it using a die from Sentiment Strips. And finally I attached everything on my Layered Argyle black & white panel using liquid glue for the Ghost Shaker, and 2mm foam squares for all the other pieces.


PRETTY PINK POSH SUPPLIES
- Ghost shaker die set
- Layered argyle stencils
- Hot foil boo script
- Large boo script die
- Sentiment strips Halloween stamp set
- Sentiment strips die set
- Halloween mug additions
- Halloween house die set
- Ghostly friends mix
- 3mm sparkling clear sequins


OTHER SUPPLIES
- Oxide inks: lost shadow, hickory smoke, black soot
- Copic opaque white ink
- Sakura white gel pen
- Clear embossing ink by Lawn Fawn
- Silver embossing powder by Lawn Fawn
- Black cardstock by Lawn Fawn
- White cardstock by Lawn Fawn
- Pattern papers by Lawn Fawn
- Vellum by Lawn Fawn
- Silver glitter cardstock by Concord & 9th
- Strathmore bristol smooth cardstock

Lawn Fawn - Make a Wish Hot Foil Birthday Cards

jeudi 29 juin 2023

Hello there,

I'm back on Lawn Fawn YouTube channel & blog with this duo of birthday cards showcasing several new products from Summer release. Birthday cards are the ones I need the most throughout the year to send to family and friends, but I always find myself not having enough. So I created those two cards that share the same design, they're pretty quick to make, only the colors are changing, and there are only a very few images to color, which is quite unusual for me, right?


I started off by stamping my images from Simply Celebrate More Critters on Transotype perfect coloring paper using jet black ink, I colored the cute critters using my Graph’it brush markers + Spectrum Noir Illustrator markers, and then cut them using the coordinating dies.


Next I moved on to the backgrounds. I gold hot foiled two Strathmore bristol smooth panels using the Confetti Background Hot Foil Plate, and colored them using oxide inks. I used squeezed lemonade + dried marigold + kitsch flamingo + picked raspberry on the first panel, and then squeezed lemonade + twisted citron + pine needle + chipped sapphire on the second panel.

Next I die cut two Let’s celebrate backdrops out of white cardstock, as well as a bunch of colorful decorative pieces that I attached on each backdrop using liquid glue. Once each backdrop was decorated, I attached them on the hot foil panels using 1mm foam squares, and then die cut two woodgrain frames that I stuck on each panel as well.


I die cut four Giant Make a Wish greetings: a light blue one, a light yellow one, and two white ones. I attached the white ones at the back of the colored ones to create an outline, I added gold glitter stars and attached those giant greetings in the upper part of my panels using 2mm foam squares. I also white heat embossed two "It's your birthday" sentiments from Offset Sayings Everyday on chocolate bar banners, attached those banners at the bottom of my panels, and then stuck my critters above those banners using foam squares again. And as always I finished both card by adding highlights and details to the images using a white gel pen.


VIDEO


LAWN FAWN SUPPLIES

Stamp sets Simply celebrate more critters Off set sayings everyday Die sets Giant make a wish Let’s celebrate backdrop Large stitched rectangle stackables Stitched rectangle frames Heart garland landscape backdrop Cardstock Woodgrain White Chocolate bar Shimmery pastel Shimmery tropical Shimmery gemstone Gold glitter Misc Confetti background hot foil plate Jet black ink Clear embossing ink White embossing powder


OTHER SUPPLIES
- Spectrum Noir Illustrator markers - Graph'it brush markers - Oxide inks: squeezed lemonade, twisted citron, pine needle, chipped sapphire, dried marigold, kitsch flamingo, picked raspberry - Sakura white gel pen - Gold foil by Spellbinders - Strathmore bristol smooth cardstock (background) - Transotype perfect coloring paper (images)

Lawn Fawn - Foiling with Regular Dies - Happy New Year Gold & Black Card

mardi 20 décembre 2022

 Hello there,

I'm back with my last Lawn Fawn video of the year, let's celebrate 2023 a little bit early with some cute kitties, balloons and champagne!

As very often I started off with the coloring. I stamped my the images using Jet black ink, used the coordinating dies to cut them all and colored everything using my alcohol markers in gold, grey and black.

Next I gold foiled a Black licorice piece of paper using the Snowy backdrop, and then cut it into a 5,5" x 4,25" panel. I also cut my Simple diagonal stripes floor, and finished it nicely with a Picket fence stripe. I attached those elements at the bottom of my gold foiled panel using double sided tape, and then gold heat embossed my "Happy New Year" greeting on a Simple wavy banner.

I cut two Cheers scripty words: a gold glitter one and a vellum one. I layered both pieces on top of each other, and then attached all the elements and images on my panel using foam squares. And as always I finished my card by adding highlights and details on the images using a white gel pen.


VIDEO


LAWN FAWN SUPPLIES

Stamp sets
- Purrfectly wicked
- Purrfectly wicked add-on
- Crazy antics
- Happy wedding
- Party animal
- Meow you doin
- Bicycle built for you
- Virtual friends add-on
- Winter wavy sayings

Die sets
- Large stitched rectangle stackables
- Snowy backdrop
- Simple stripes diagonal backdrop
- Simple wavy banners
- Picket fence
- Cheers scripty words

Papers
- Black licorice
- Gold glitter
- Vellum

Misc
- Clear embossing ink
- Gold embossing powder
- Jet black ink


OTHER SUPPLIES
- Spectrum Noir Illustrator markers
- Graph'it brush markers
- Gold foil by Spellbinders
- Sakura white gel pen
- Tombow mono sand eraser

Lawn Fawn - Hot Foil Vellum Overlay

jeudi 24 novembre 2022

 Hey there,

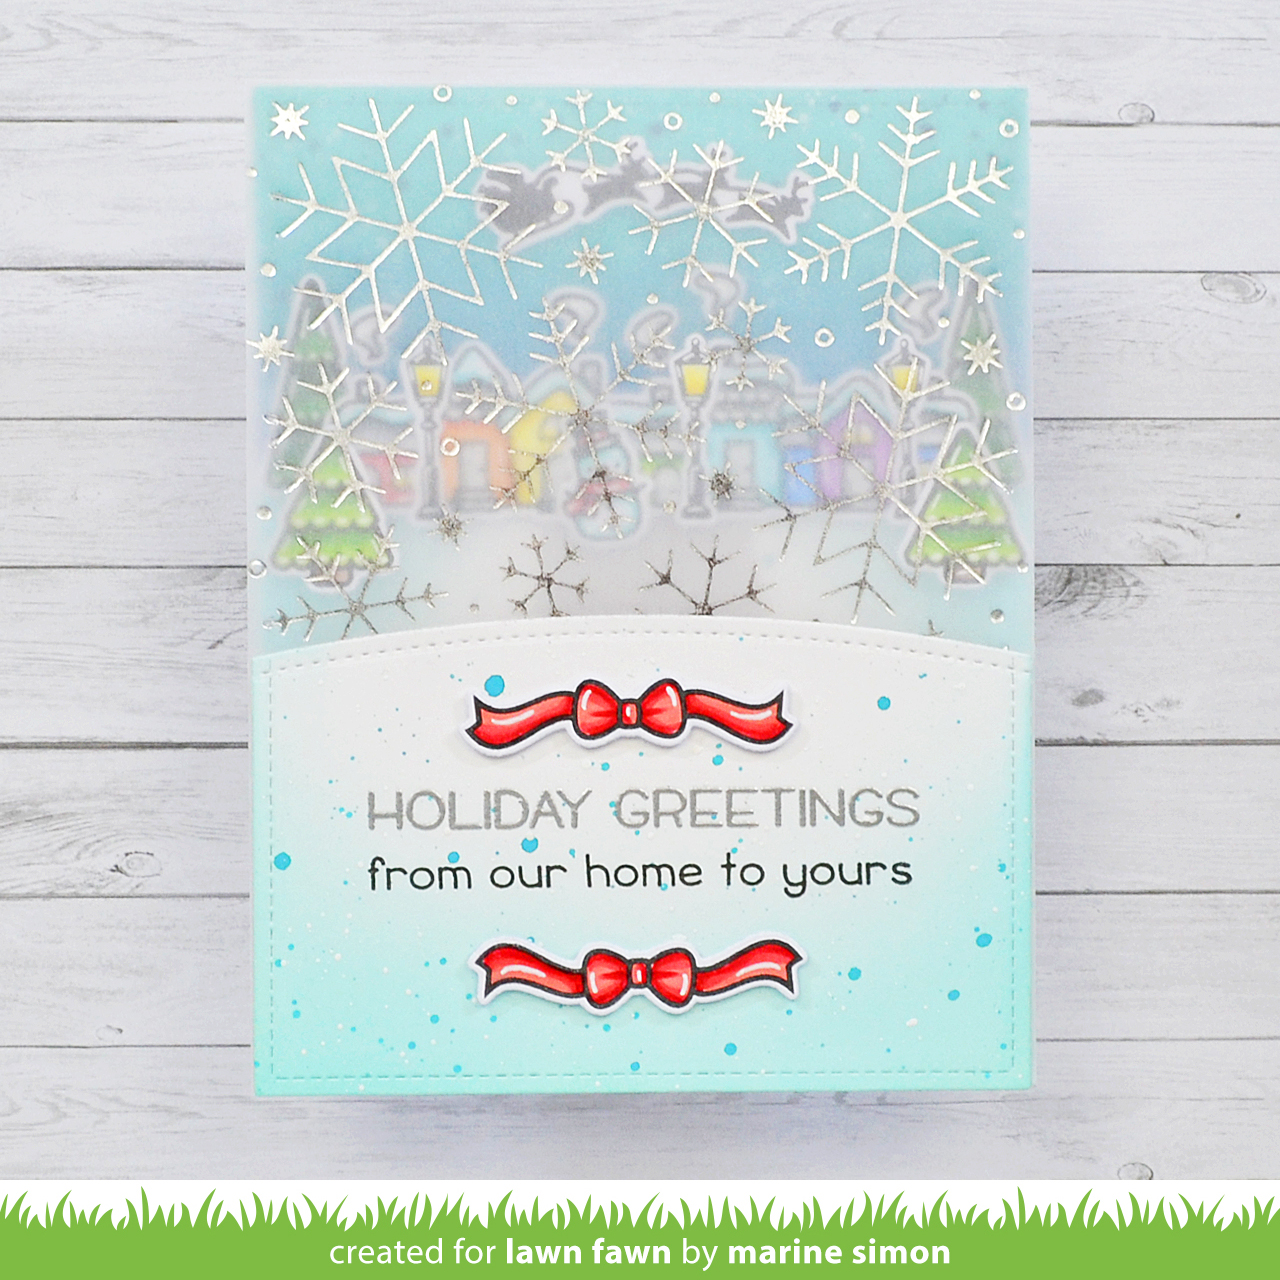
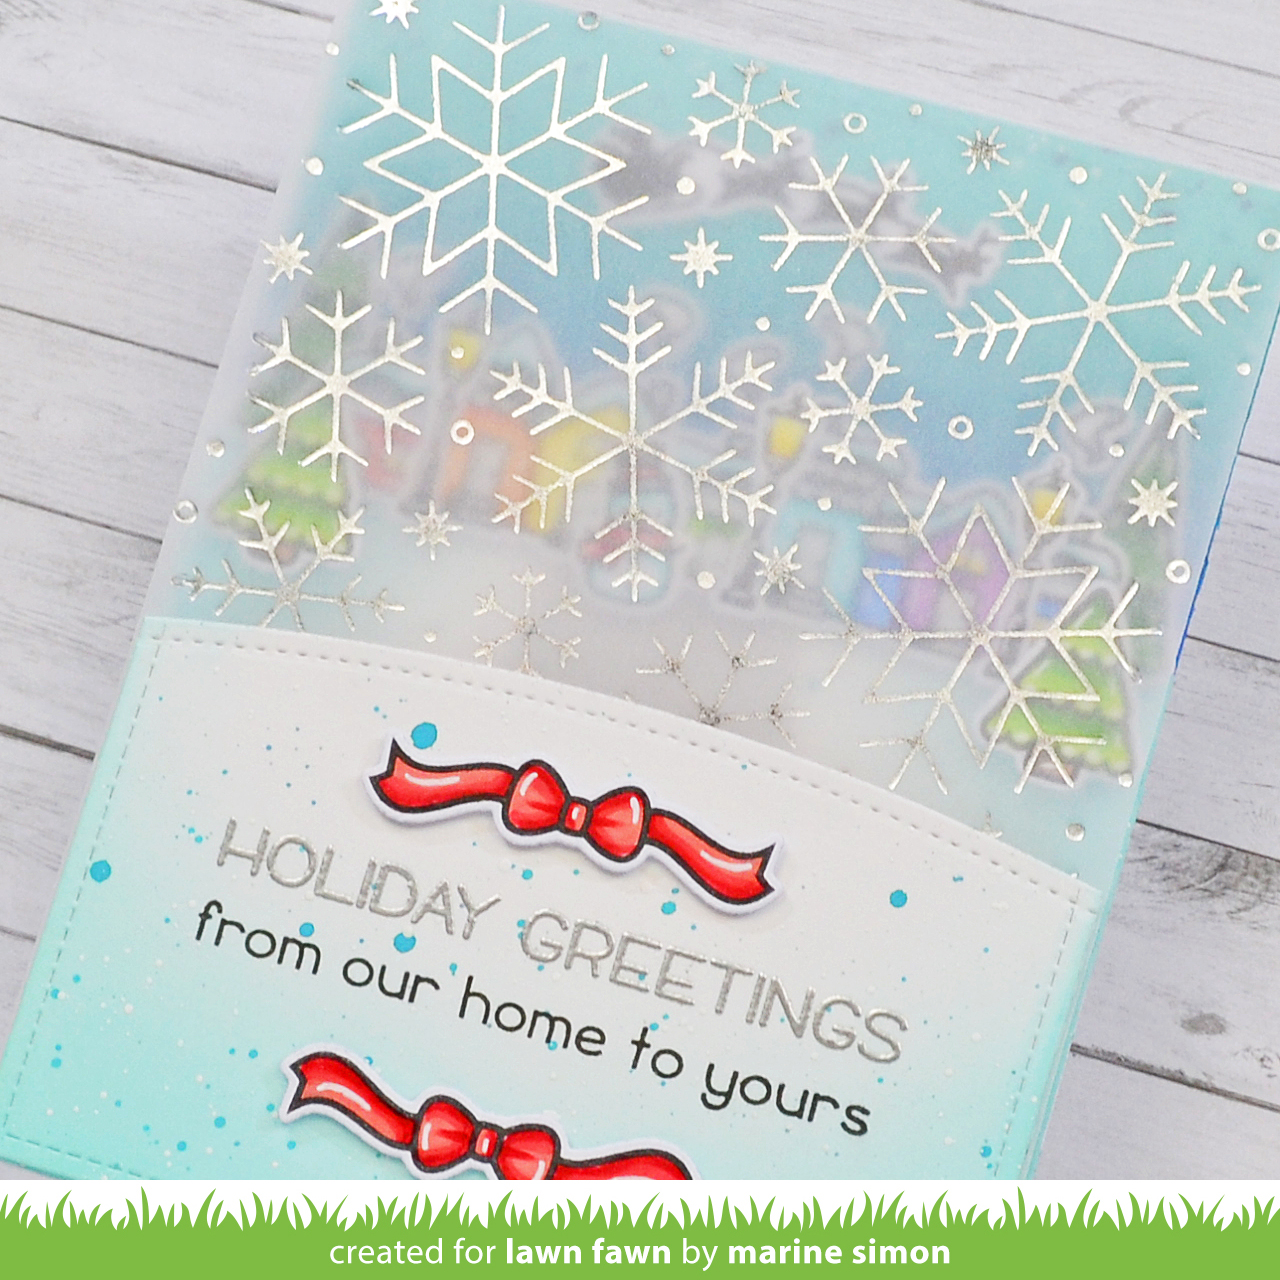
I'm back today on Lawn Fawn YouTube Channel & Blog with this cute and simple little scene that I made more interesting by adding a silver foiled vellum overlay panel on the front to hide the lower part of the scene and this way surprise the recipient of the card.

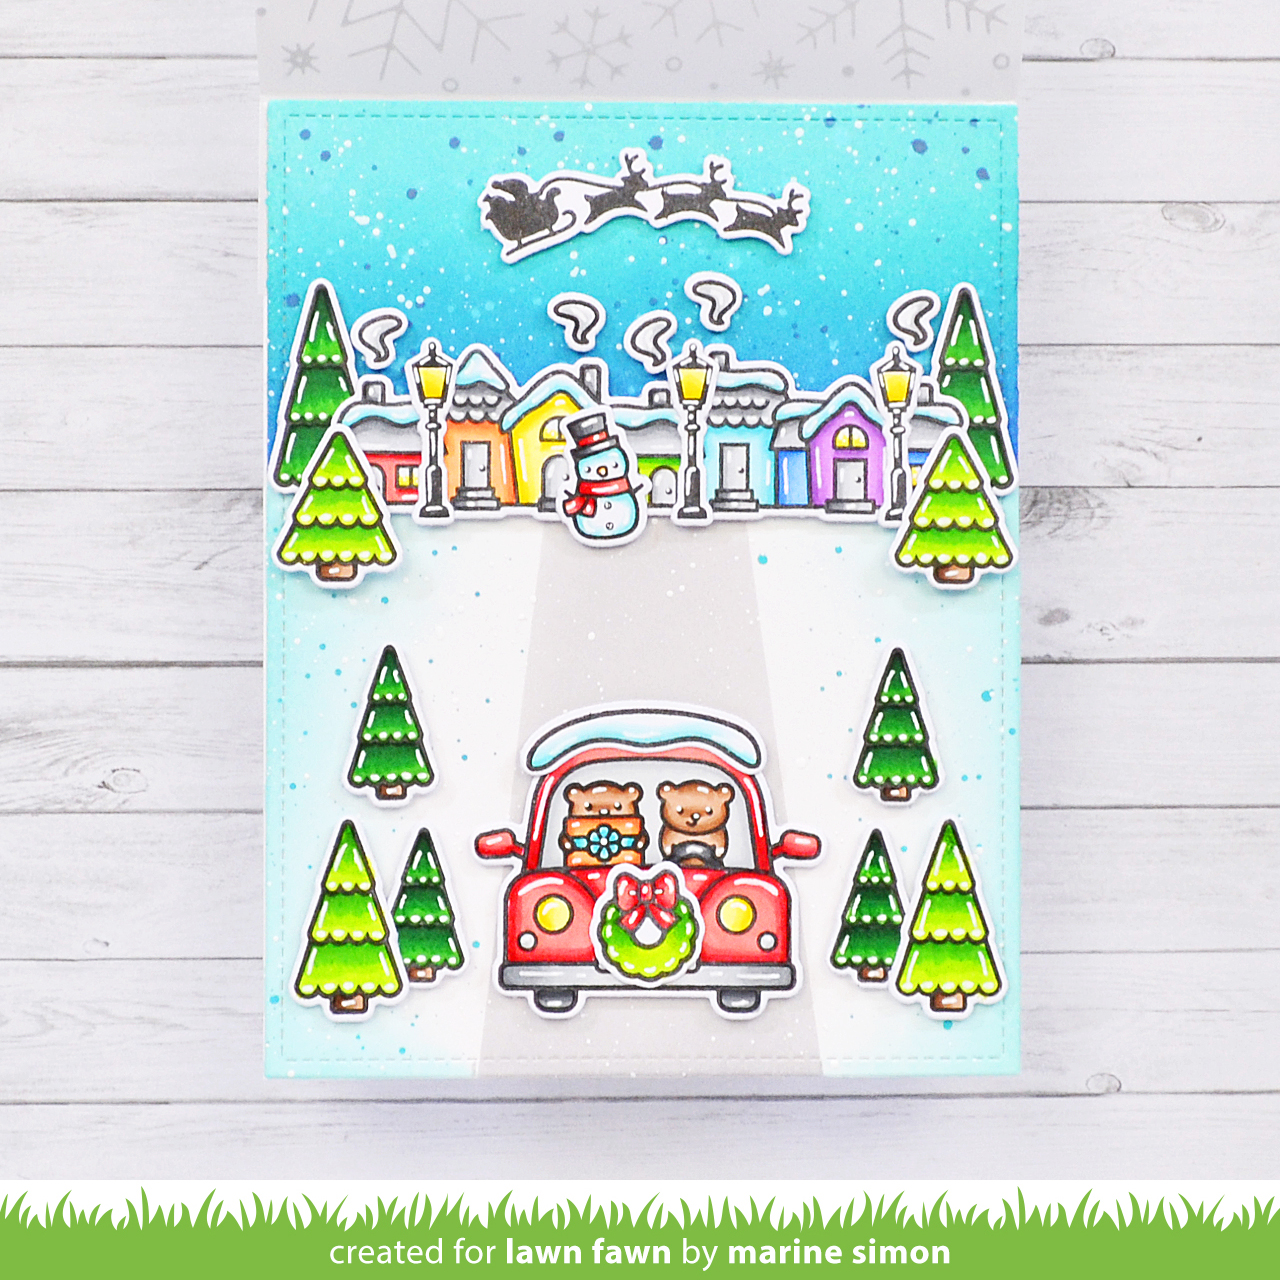
I stamped the images first using Jet black ink, I cut them all using the coordinating dies, and colored everything using my alcohol markers.


I cut a 5,5" x 4,25" bristol panel, and divided it in several parts to create a landscape. On the upper part I did the sky using salvaged patina, peacock feathers and blueprint sketch oxide inks. On the lower part, I did the road using hickory smoke oxide ink, and the snowy sides using salvaged patina oxide ink.


I cut a vellum panel longer than the Snowflake background hot foil plate, I silver foiled it, and then trimmed the sides and bottom. I scored the top part, leaving 1/4" above that score line, and then folded the score line, and before attaching this vellum panel to the landscape panel, I stuck the images on that background panel using foam squares, liquid glue and glue dots.


Next I assembled the card. I added double sided tape on the inside top section of the vellum overlay. I also cut two Simple stitched hillsides: one with my greeting and two bows that goes at the bottom of the vellum overlay, and an identical one that goes at the back. I attached the vellum overlay to the landscape panel, and finally to a white card base.


VIDEO


LAWN FAWN SUPPLIES

Stamp sets
- Winter village
- Christmas dreams
- Car critters
- Car critters Christmas add-on
- Tiny winter friends
- Simply celebrate winter
- Winter skies
- Happy village

Die sets
- Large stitched rectangle stackables
- Simple stitched hillside borders

Misc
- Snowflake background hot foil plate
- Silver foil
- Jet black ink
- Clear embossing ink
- Silver embossing ink
- Vellum


OTHER SUPPLIES
- Spectrum Noir Illustrator markers
- Graph'it brush markers
- Oxide inks: salvaged patina, peacock feathers, blueprint sketch, hickory smoke
- Sakura white gel pen
- Copic opaque white ink
- Strathmore bristol smooth cardstock (background)
- Transotype perfect coloring paper (images)

Lawn Fawn - Reveal Wheel Monochromatic Foiled Card

jeudi 10 novembre 2022

 Hi there,

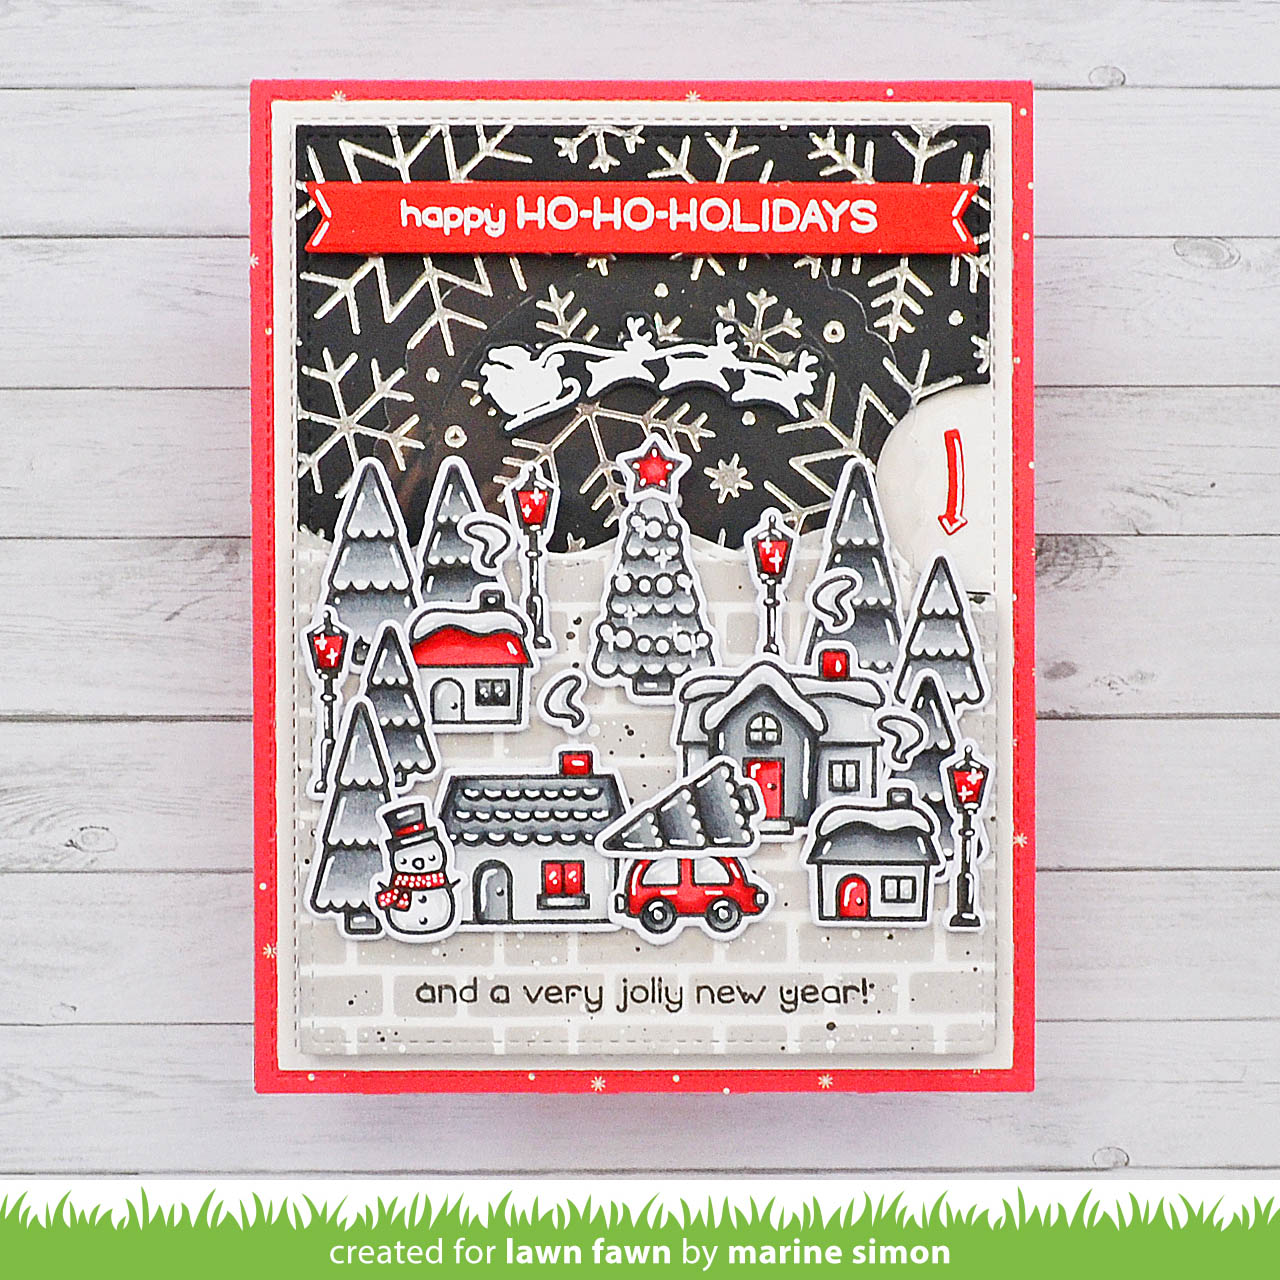
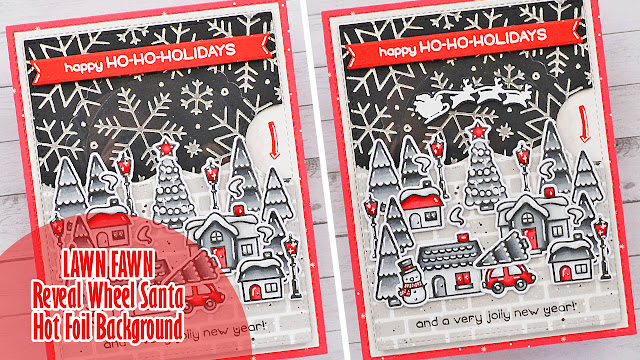
I'm so happy to be back on Lawn Fawn YouTube Channel & Blog with this new interactive card that features a whole bunch of different things: hot foil, stenciling, a monochromatic color palette and an acetate wheel to make Santa appear and disappear.

As very often I started off by stamping all my images on Transotype perfect coloring paper using Jet black ink. I cut them all using the coordinating dies, and then colored everything using my alcohol markers. I went for a black & white monochromatic color palette, with some red accents here and there. All the stamps sets I picked my images from are listed at the end of this article.


After the coloring, I silver hot foiled a piece of Black licorice cardstock using the Snowflake background hot foil plate, and from that piece of paper, I cut a Reveal wheel panel. Next I created the interactive mechanism, and I invite you to watch the process video down below to see how it was made.

Next, I cut Simple stitched wavy border out of Strathmore bristol smooth cardstock as tall as when you turn the wheel, Santa's silhouette can hide behind it. And before attaching that border, I added a little some details to it. I first created a pavement texture using the Brick stencil along with hickory smoke oxide ink. And I also added copic opaque white ink splatters, as well as black soot oxide + water splatters.


I white embossed my "Happy ho-ho-holidays" greeting from Ho-ho-holidays on a red Everyday sentiment banner, and stamped "and a very jolly new year" from the same set at the bottom of the pavement section using Jet black ink.

And then I assembled everything. I attached a Let is shine red panel to a card base, and stuck a White dotted panel on top of it. I attached the pavement border to the hot foil snowflake black panel using 2mm foam squares, and then stuck my interactive panel to the card base.


I cut a small red arrow next to the acetate wheel to let the recipient of the card know that they have to turn the wheel to make Santa's silhouette appear and disappear, and I attached the red banner at the top of the card.

I attached the images using 1mm foam squares mostly, and to finish the card I added highlights and details to the images using a white gel pen.


VIDEO


LAWN FAWN SUPPLIES

Stamp sets
- Winter village
- Happy village
-Yeti ot not
- Car critters Christmas add-on
- Tiny winter friends
- Winter skies
- Ho-ho-holidays

Die sets
- Reveal wheel
- Large stitched rectangle stackables
- Outside in stitched rectangle stackables
- Everyday sentiment banners
- Simple stitched wavy borders

Cardstock & paper
- Black licorice
- White textured dot (neutrals pack)
- Let it shine paper pack
- Acetate

Misc
- Snowflake background hot foil plate
- Brick stencil
- Clear embossing ink
- White embossing powder
- Jet black ink
- Silver foil


OTHER SUPPLIES
- Spectrum Noir Illustrator markers
- Graph'it brush markers
- Oxide inks: hickory smoke, black soot
- Sakura white gel pen
- Copic opaque white ink
- Strathmore bristol smooth cardstock (background)
- Transotype perfect coloring paper (images)